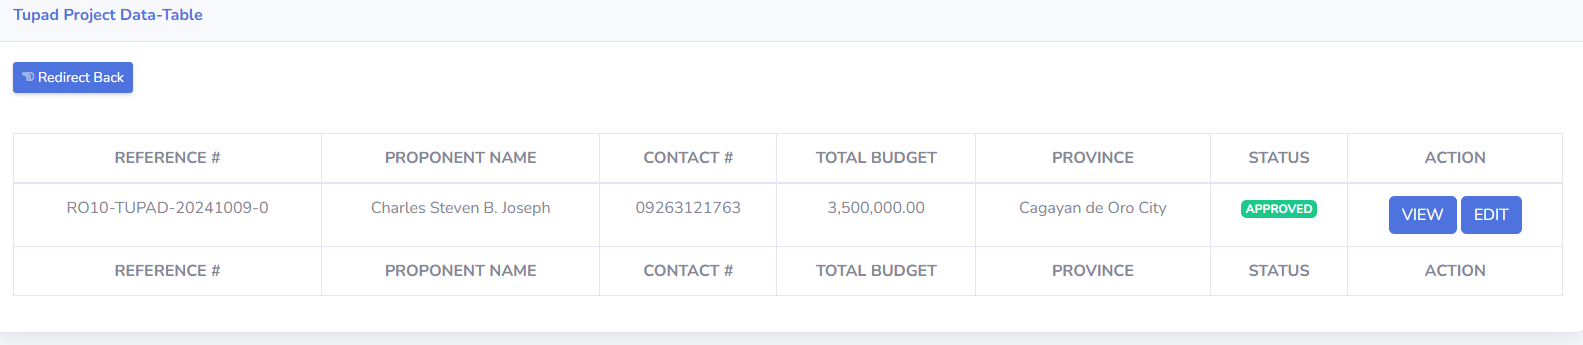
3.5. Tupad Project Table
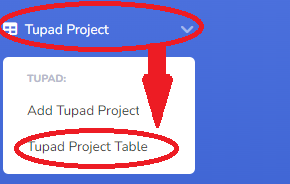
View the Tupad Project table by clicking 'Tupad Project' and then 'Tupad Project Table'.
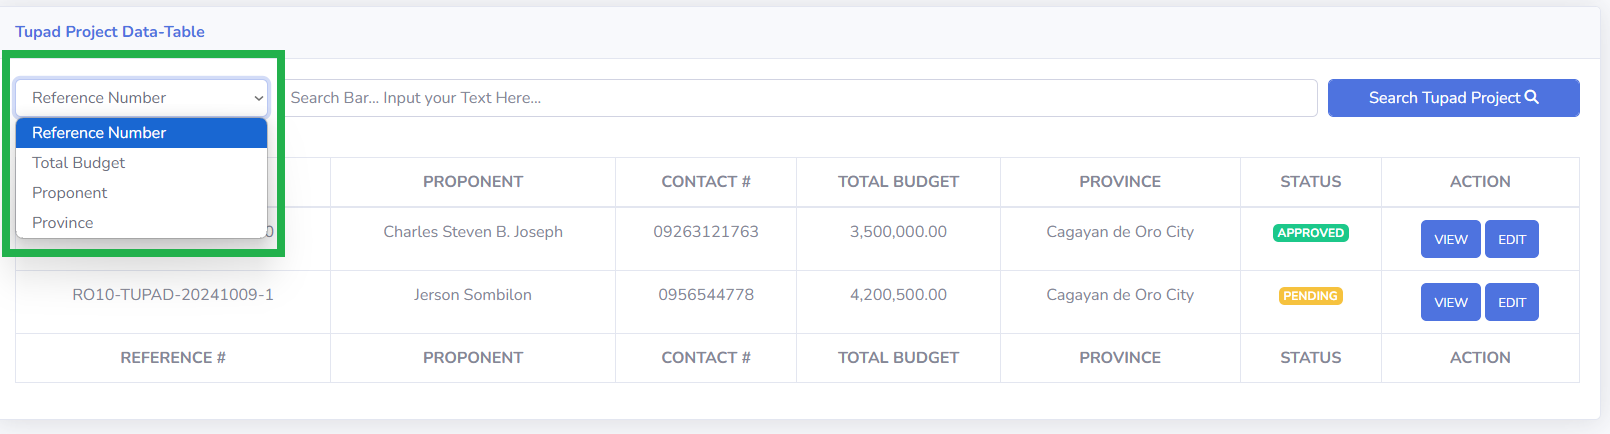
The user will select options for filtering the specific project.
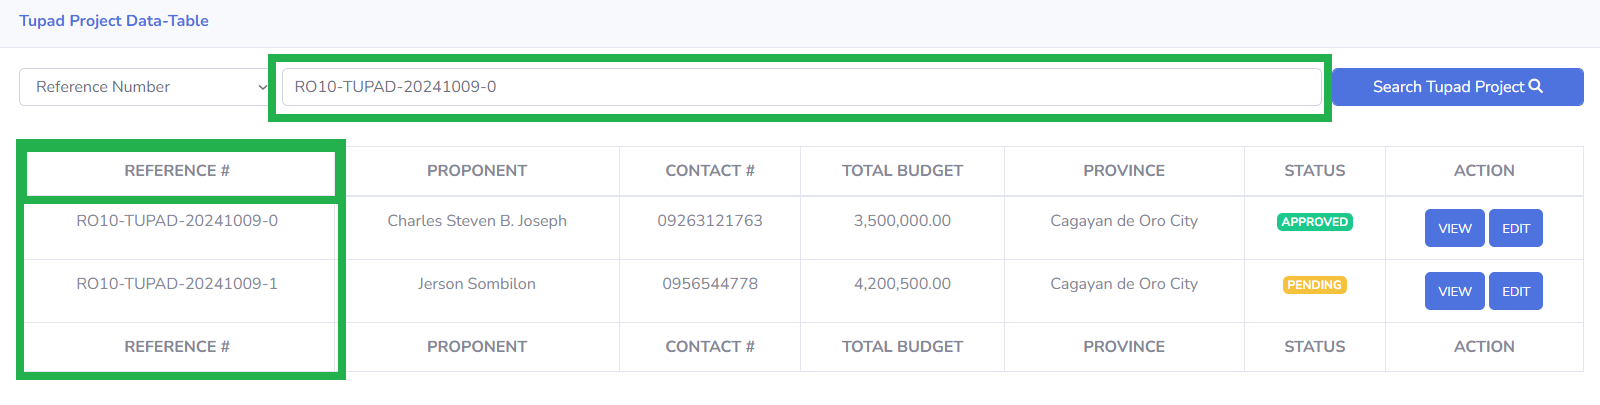
The user will input their desired filter in the search field. In the image, the user has entered the Reference Number to search the specific project.
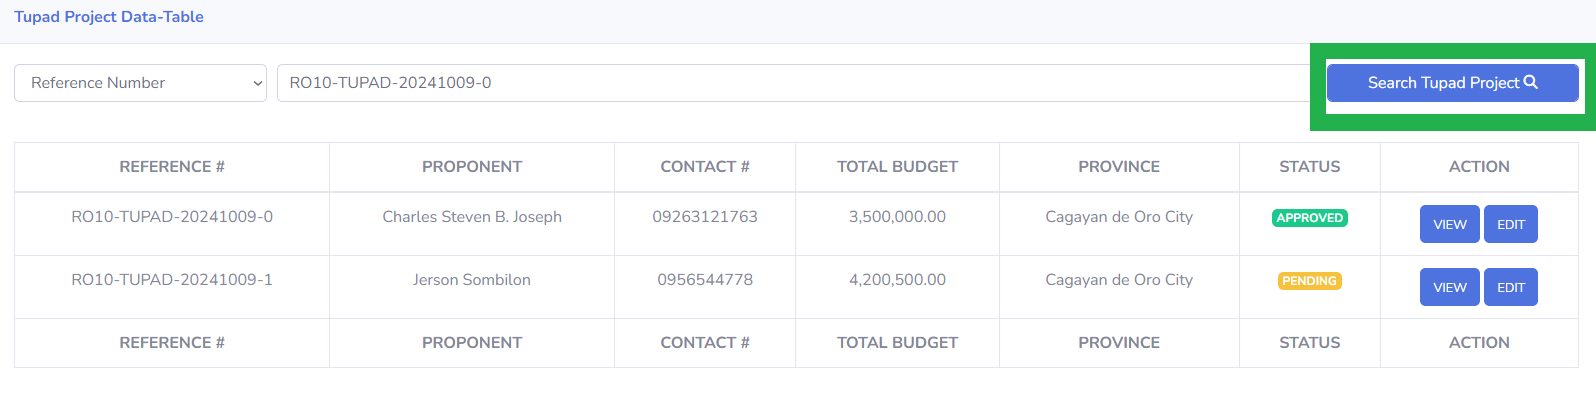
After selecting an option and entering the search criteria, the user will click the 'Search Tupad Project' button.
- The figure shows that the searched project is displayed on the page.
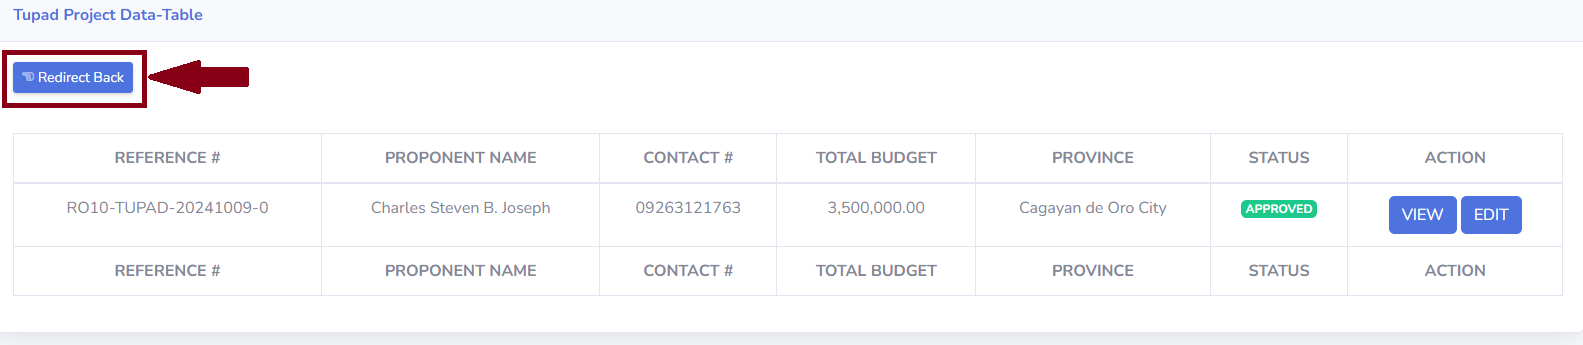
- Click 'Redirect Back' to return to the Project Table List.
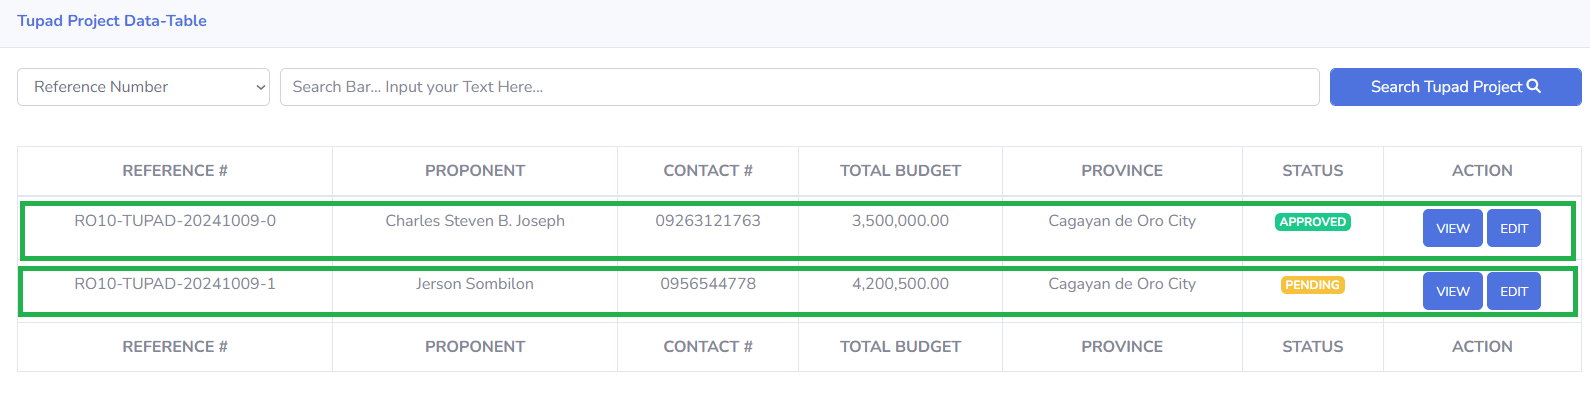
- In the image shown, the table contains two projects.

- The 'VIEW' button allows the user to view the project details.

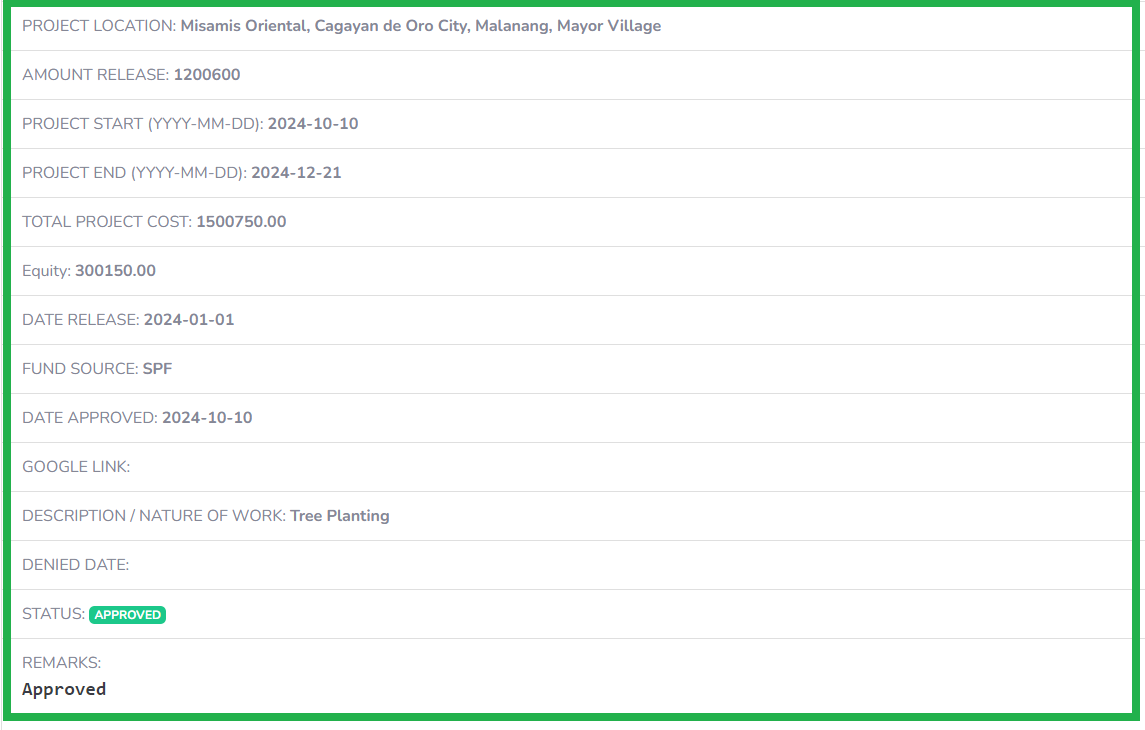
- This image shows the project details.
3.5.1. Generate The Project Information
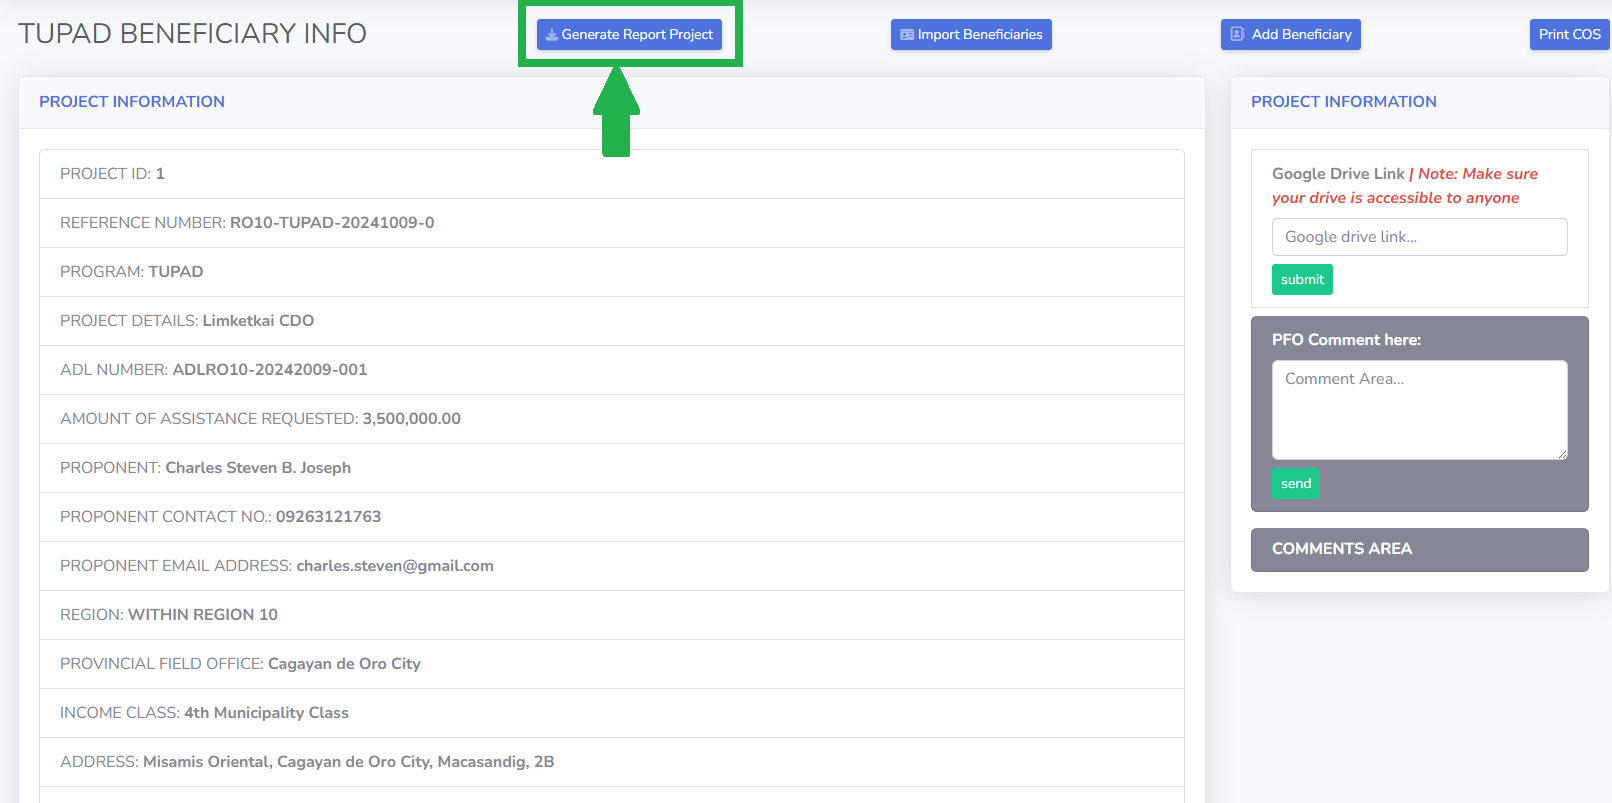
- Create the 'Generate Report Project' to download the Project Information.
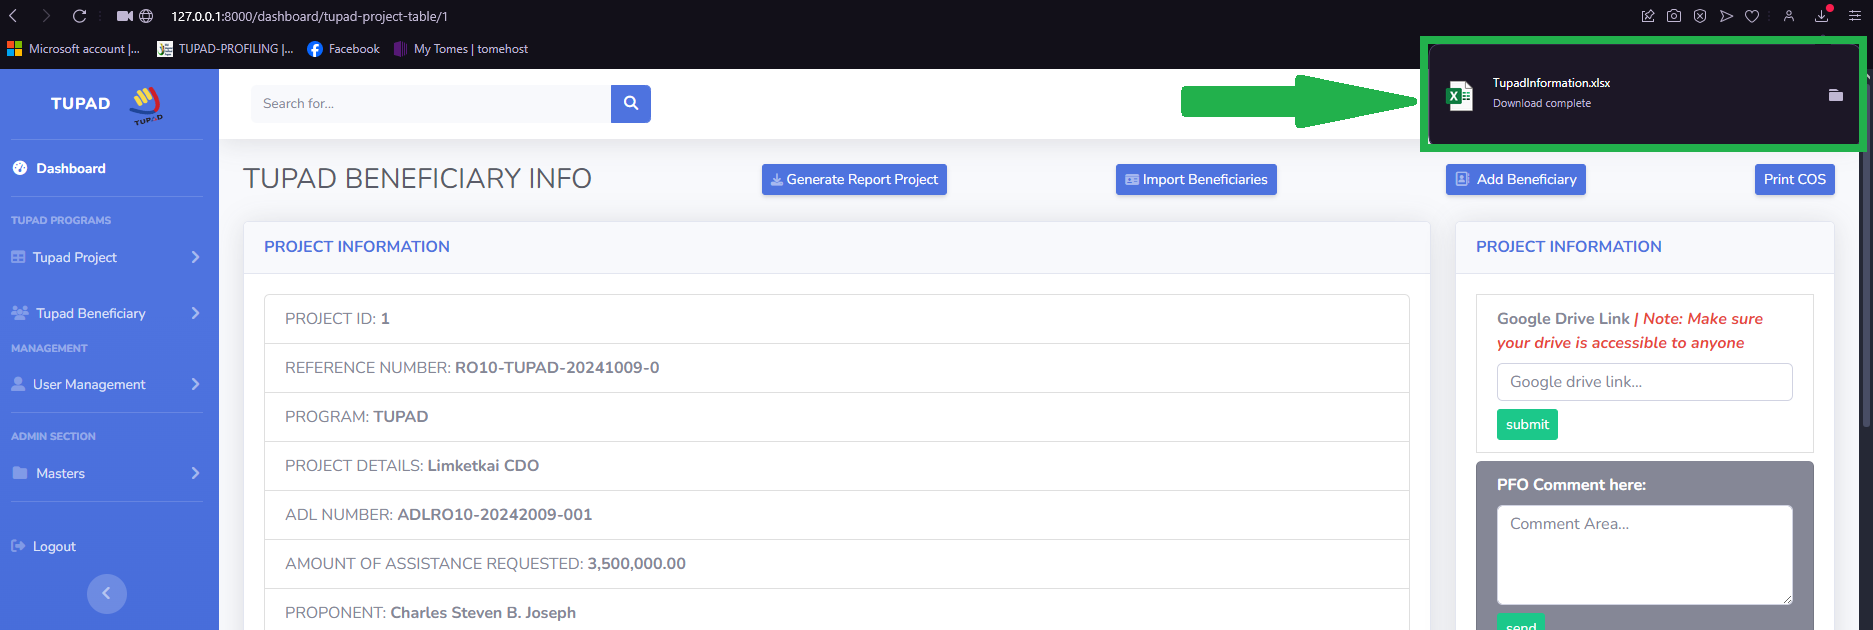
- After clicking the 'Generate Report Project' the file will be downloaded
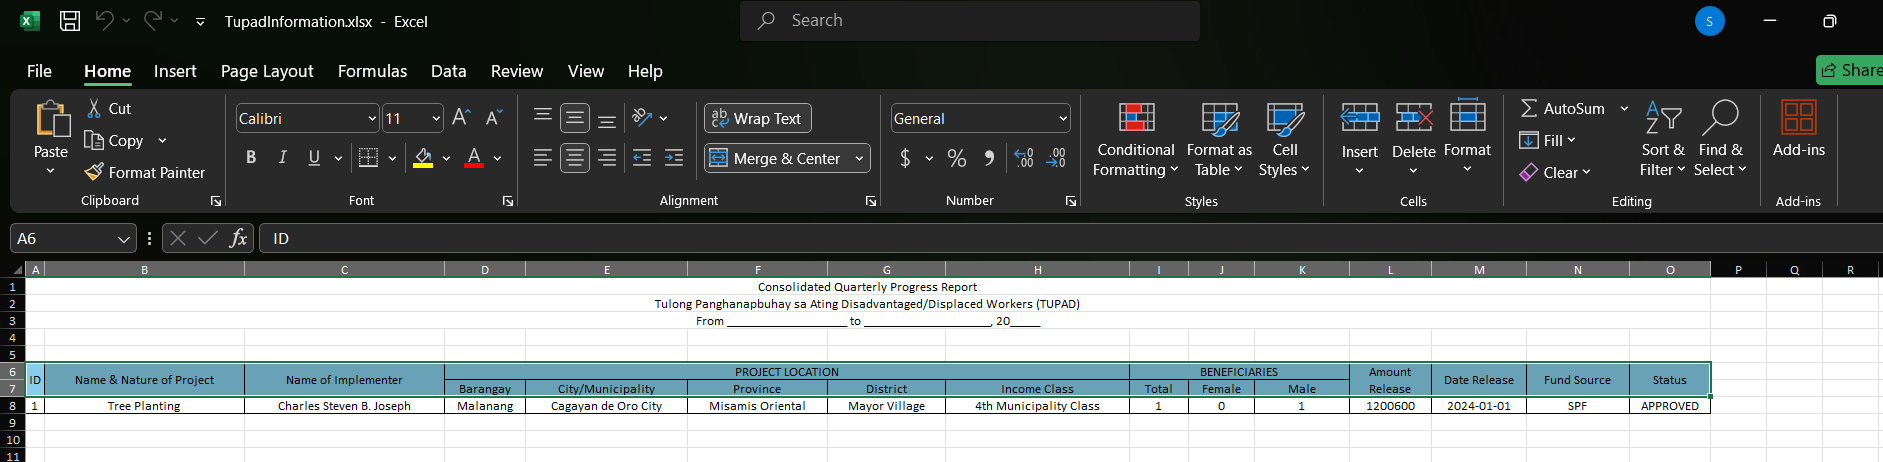
- This is the Generated Project Report
3.5.2. Import Beneficiary
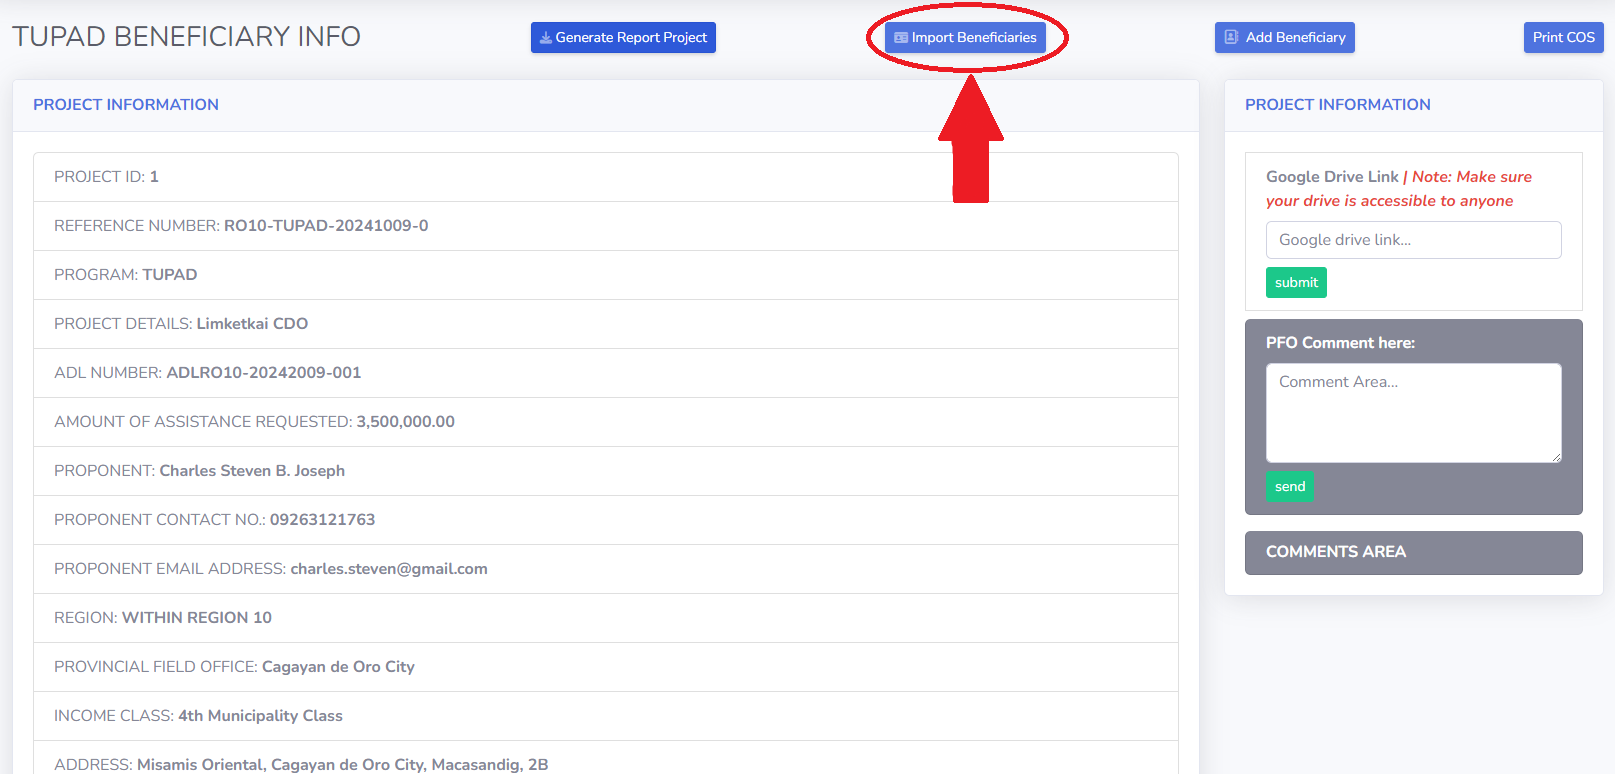
- To import a beneficiay just simply click 'Import Beneficiaries'.
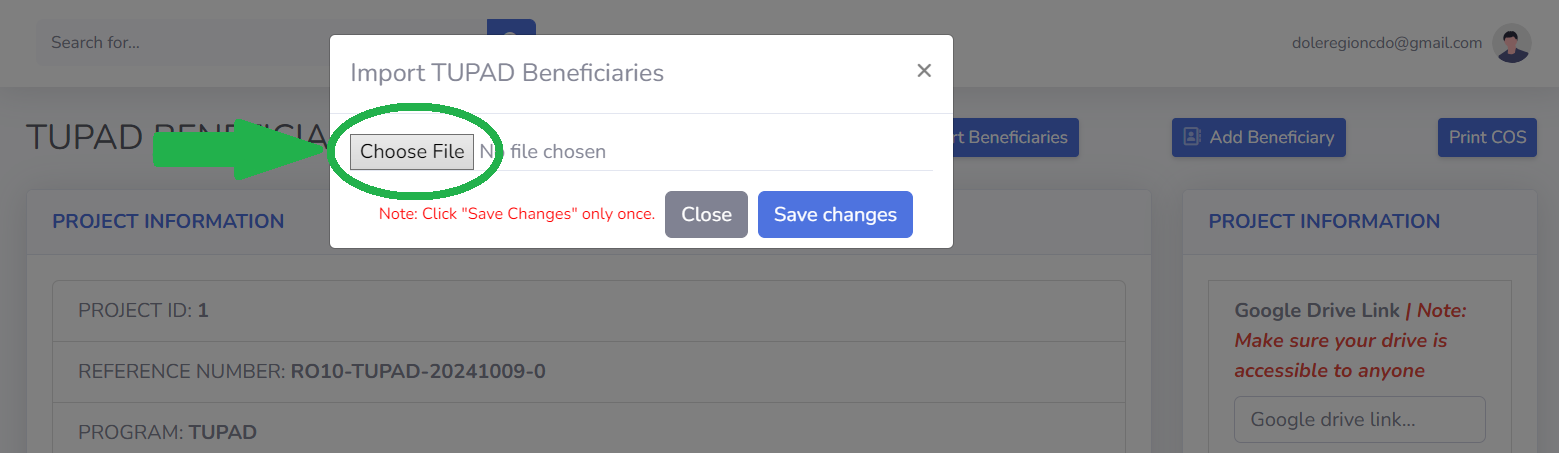
- Click 'Choose File' to browse and select a file to import.
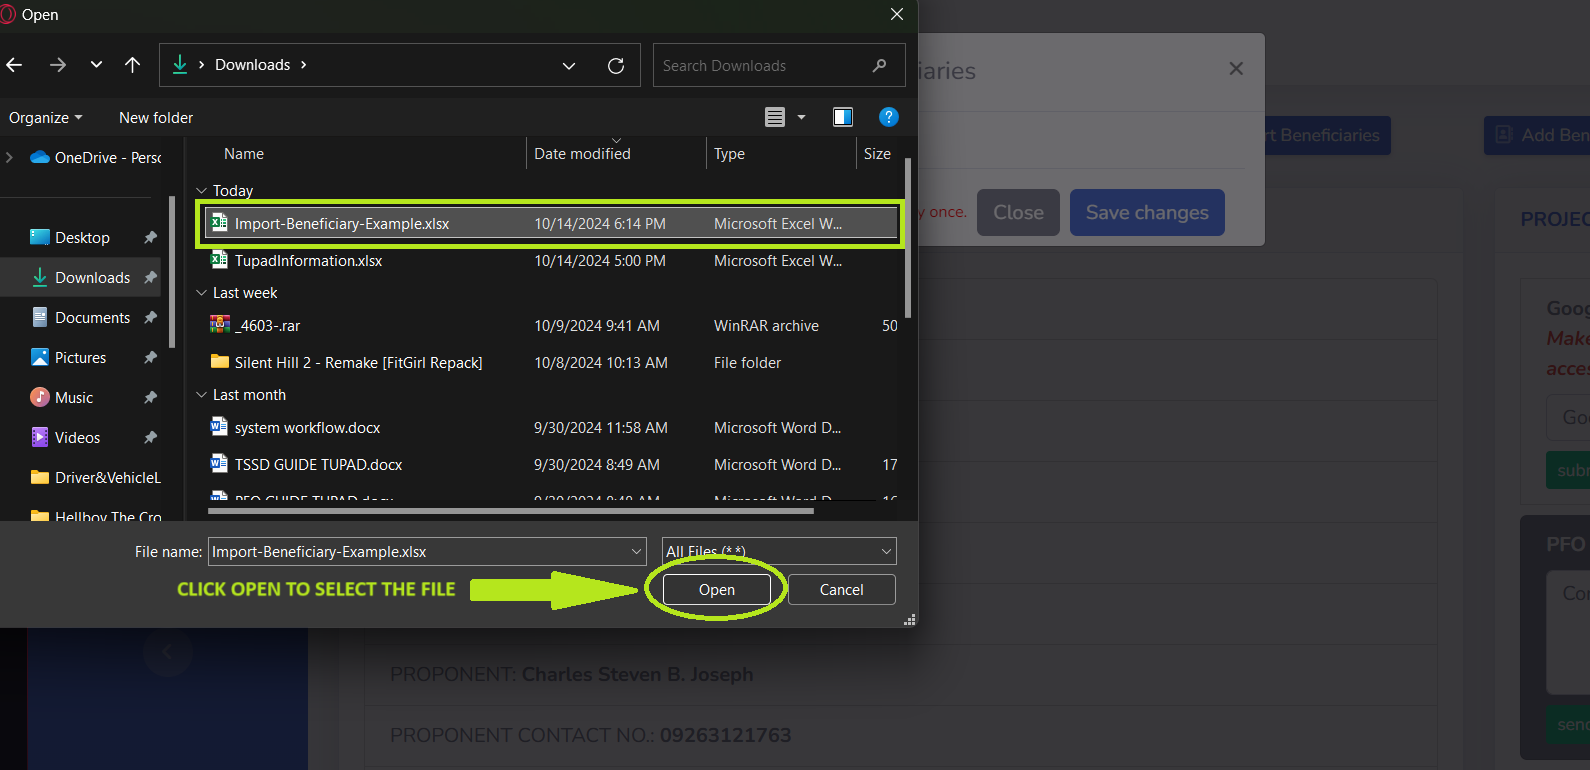
- Browse for the file to import into the system and click 'OPEN' to select the desired file.
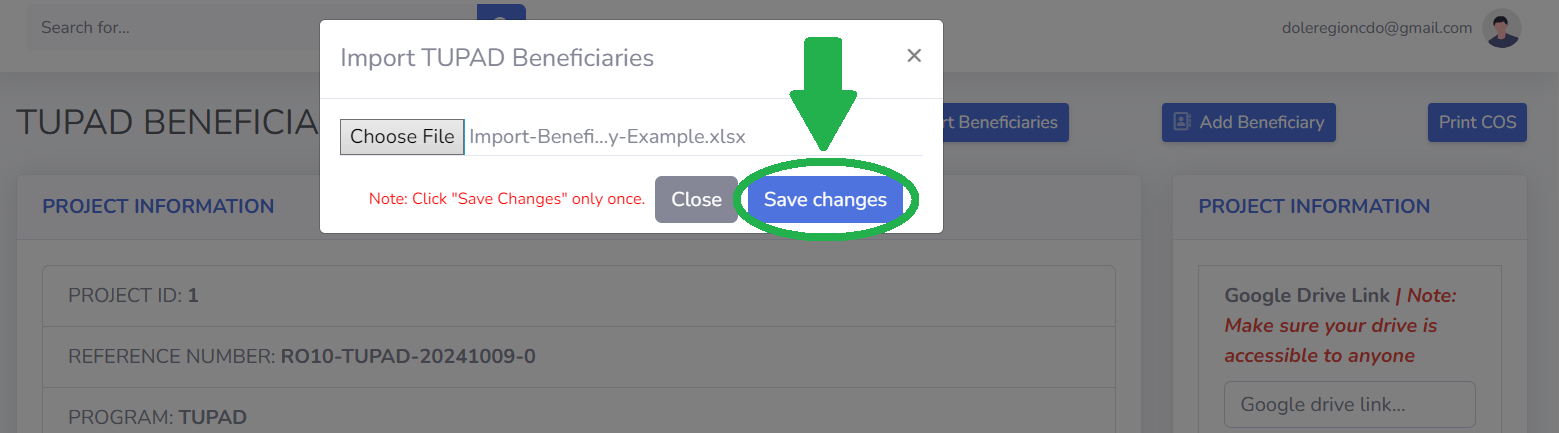
- Click 'Save Changes' to import the beneficiaries.
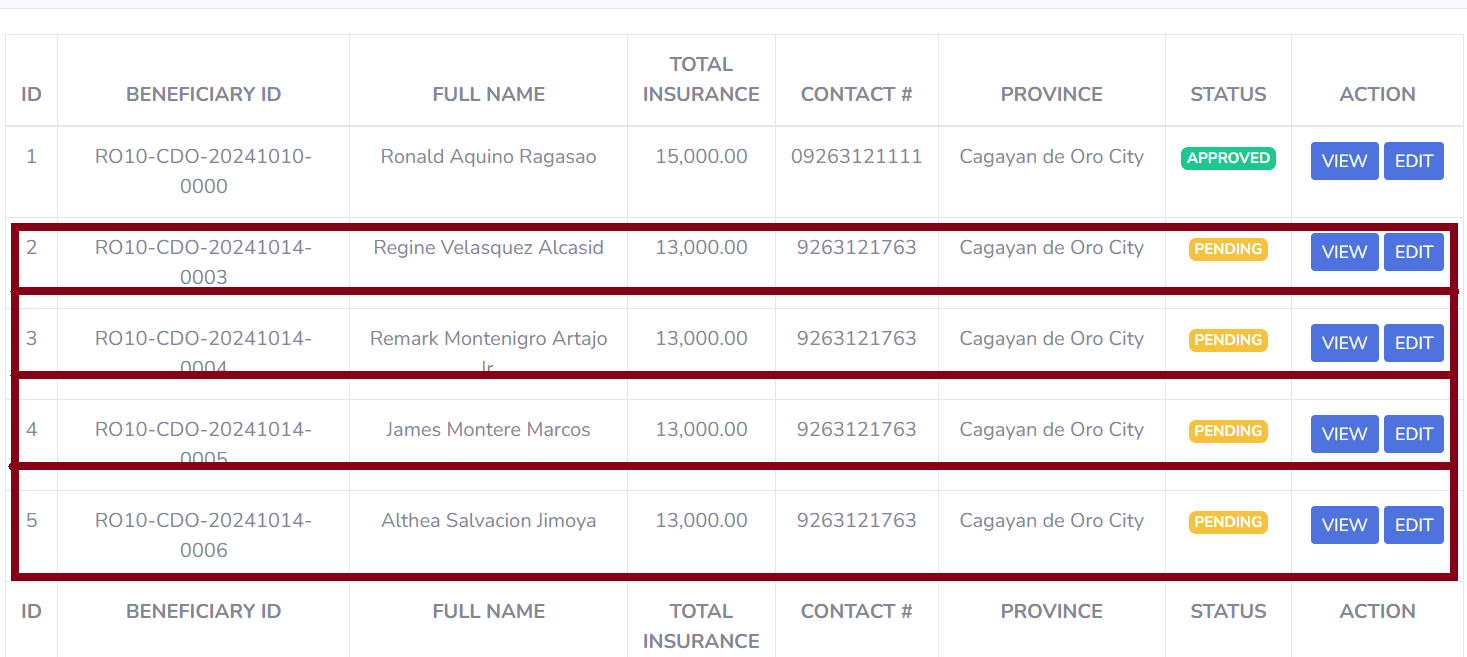
- The image shows the file that the user imported.
3.5.3. Add Beneficiary To The Specific Project
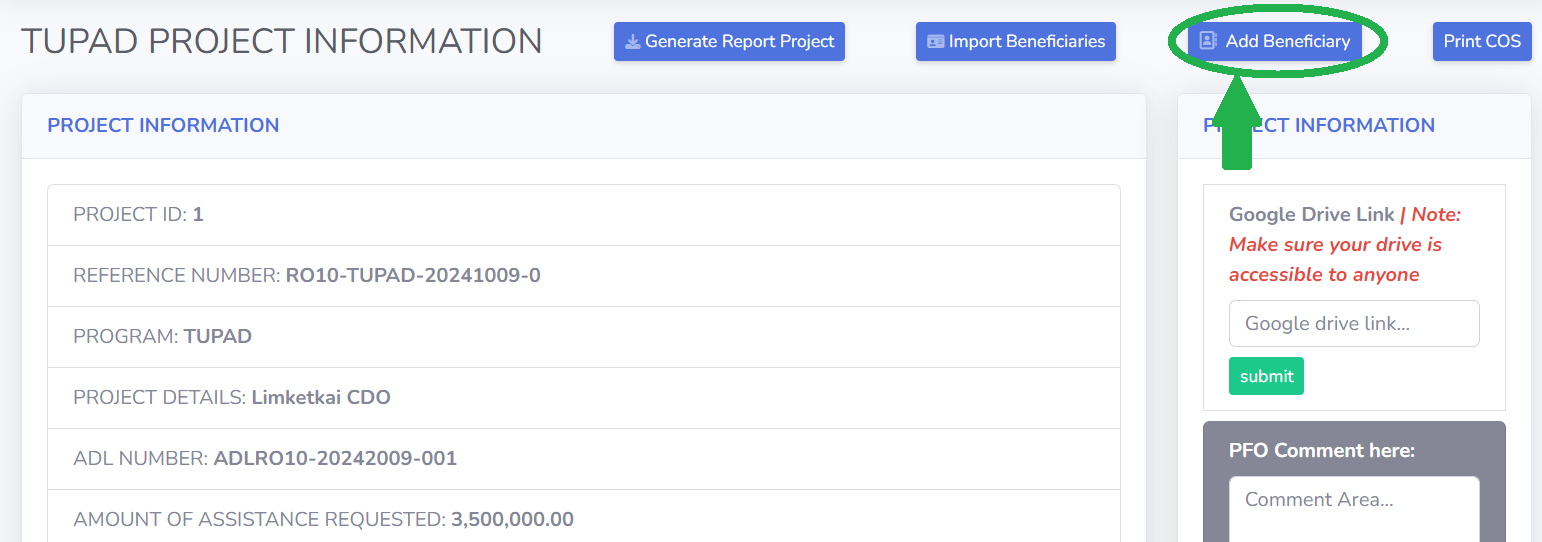
- Adding beneficiary to specific project by clicking the 'Add Beneficiary' button in the Project Information
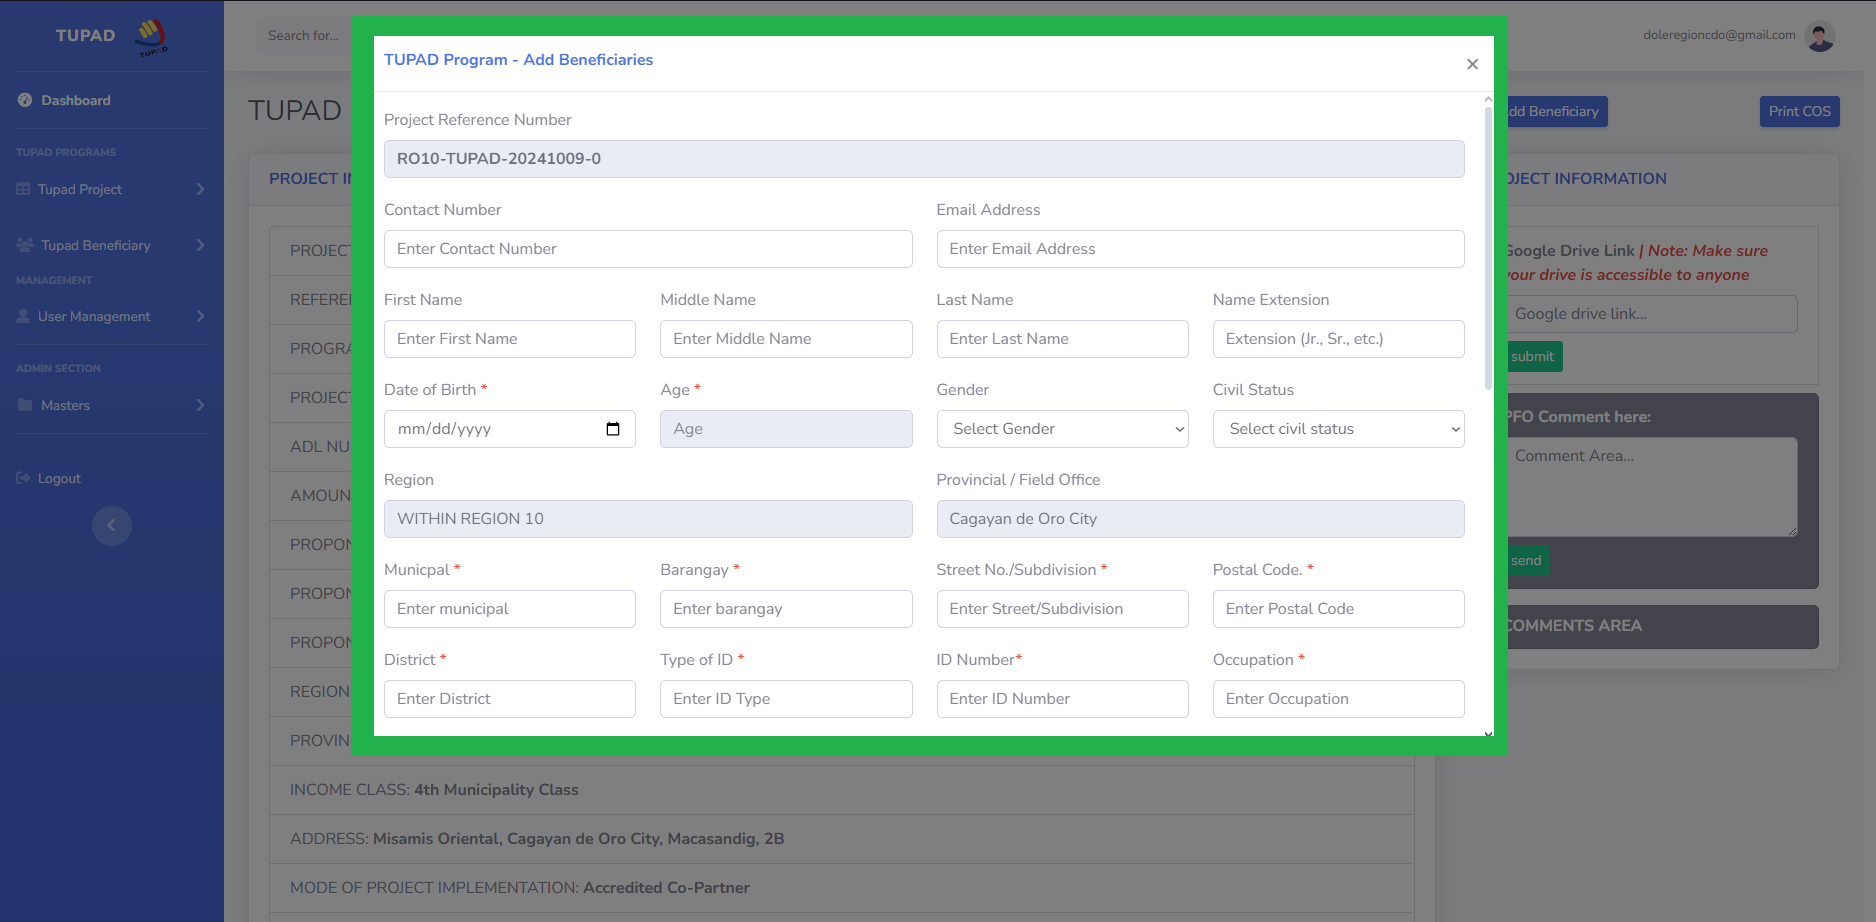
The user will input all the beneficiary details required by the form.
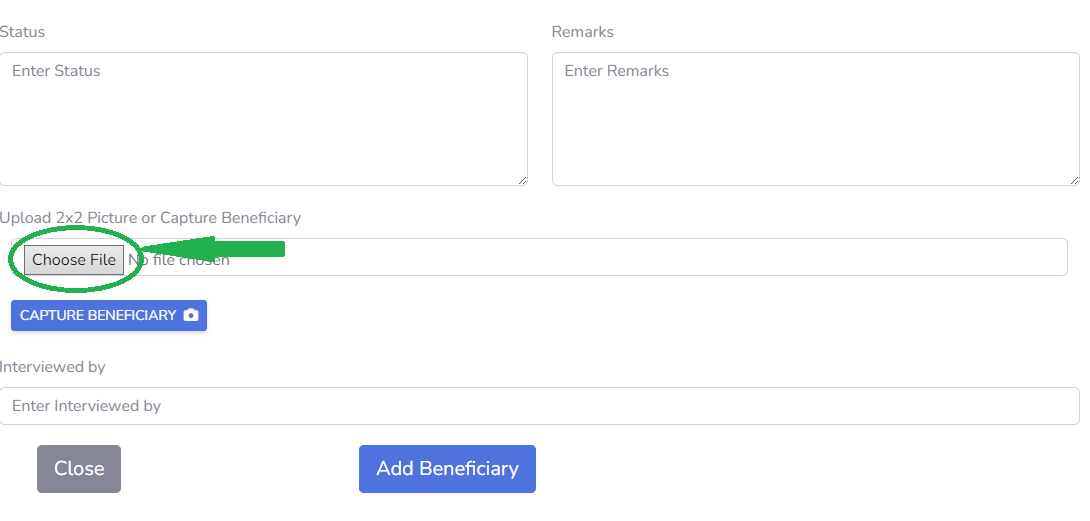
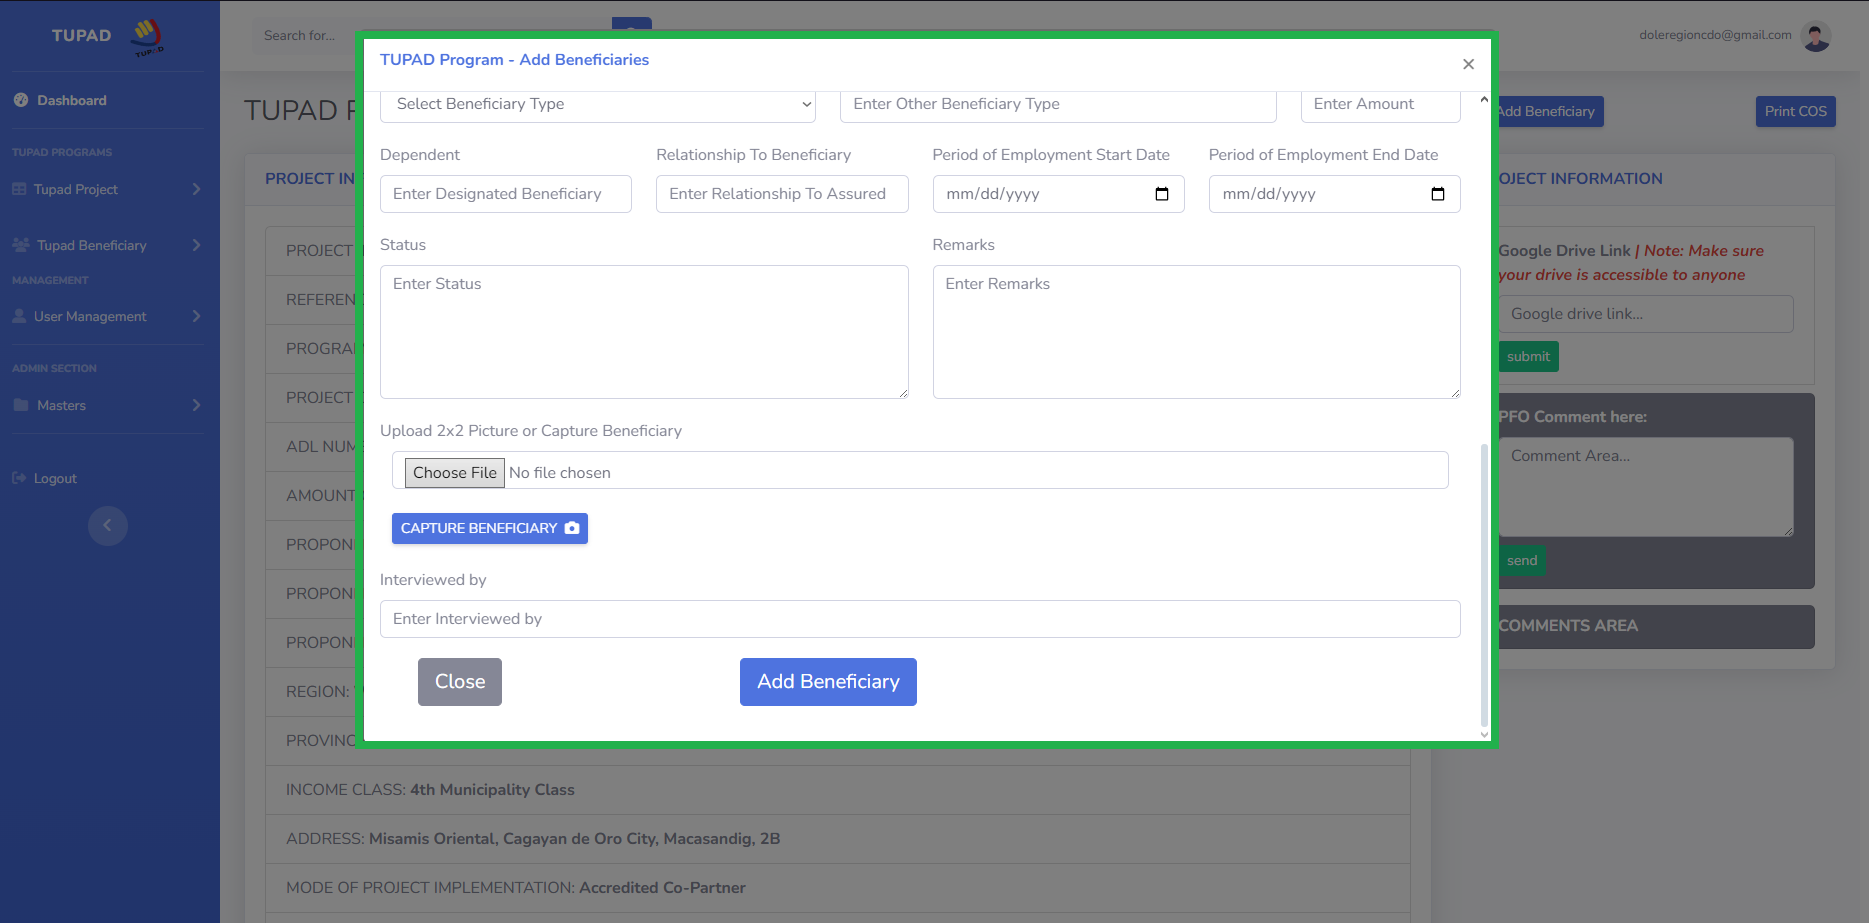
- Click 'Choose File' to browse the 2x2 picture
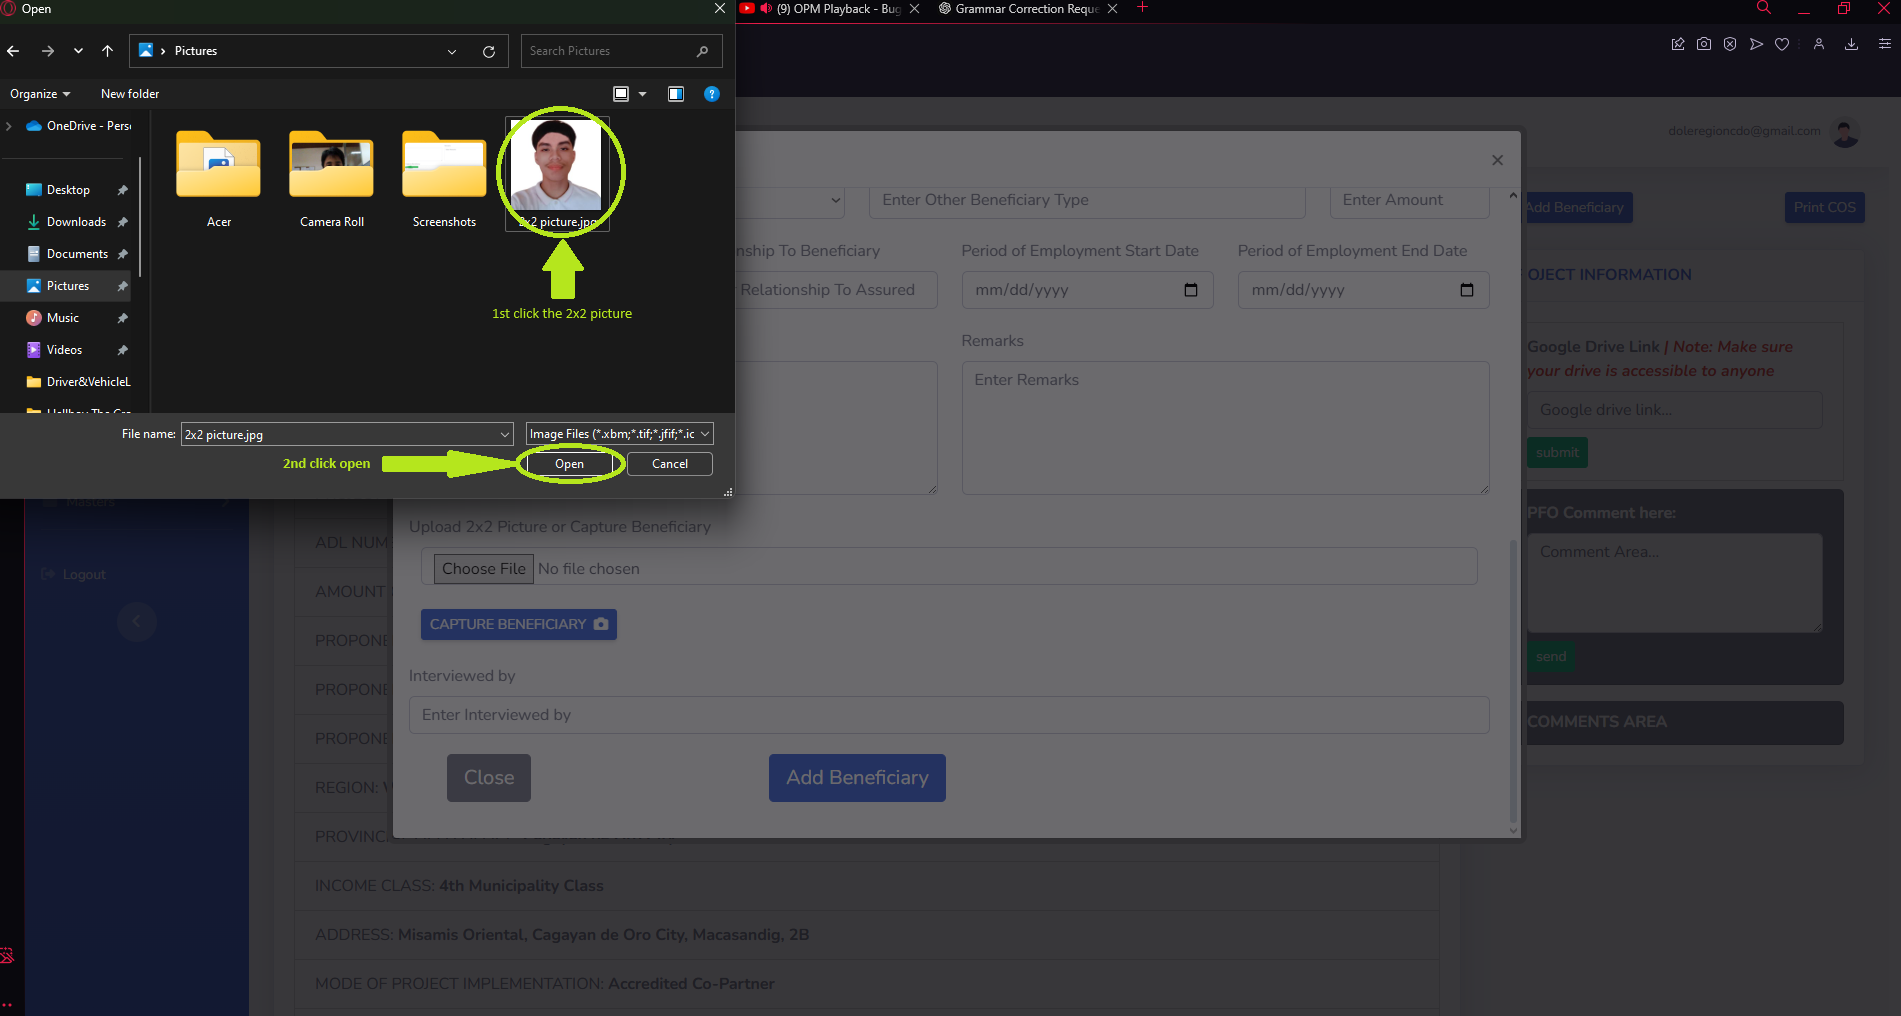
- Click the 2x2 picture and then click open to save sa picture
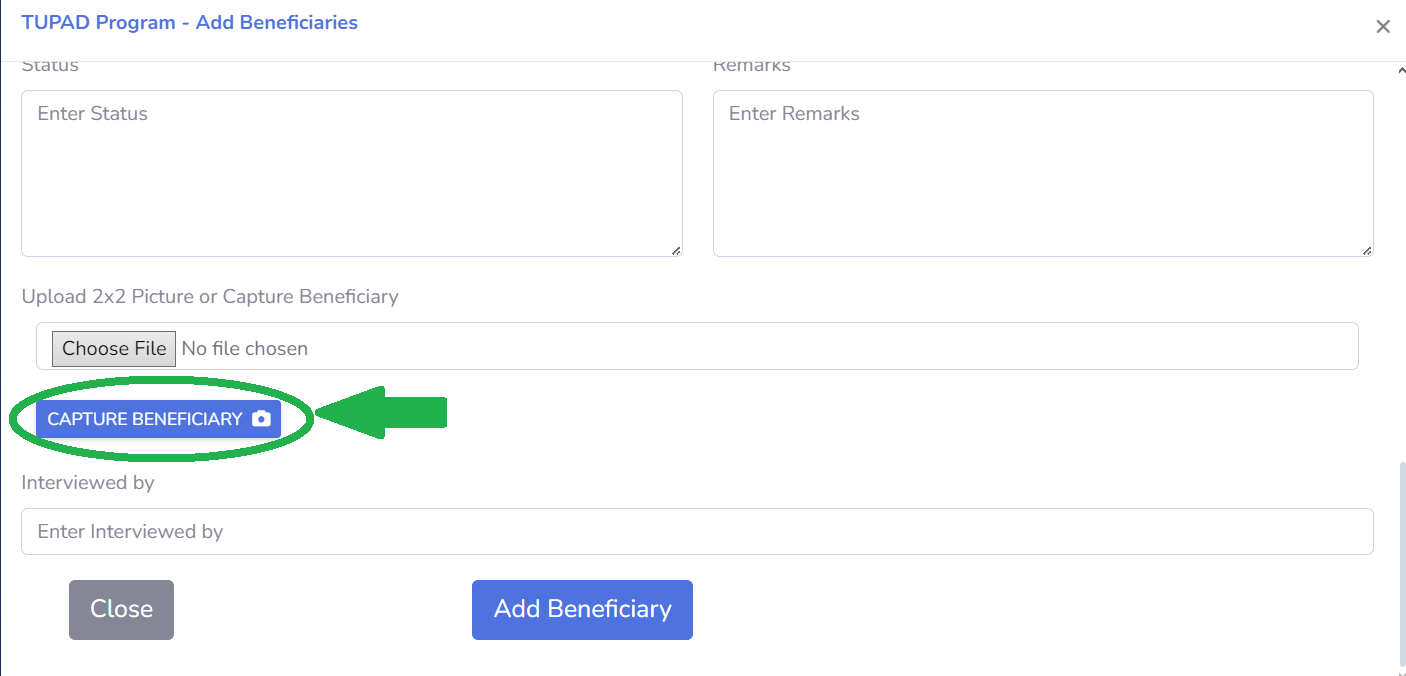
- Click the 'Capture Beneficiary' button to take a photo of the beneficiary.

User must click the 'Capture' button first and click the 'Upload'.
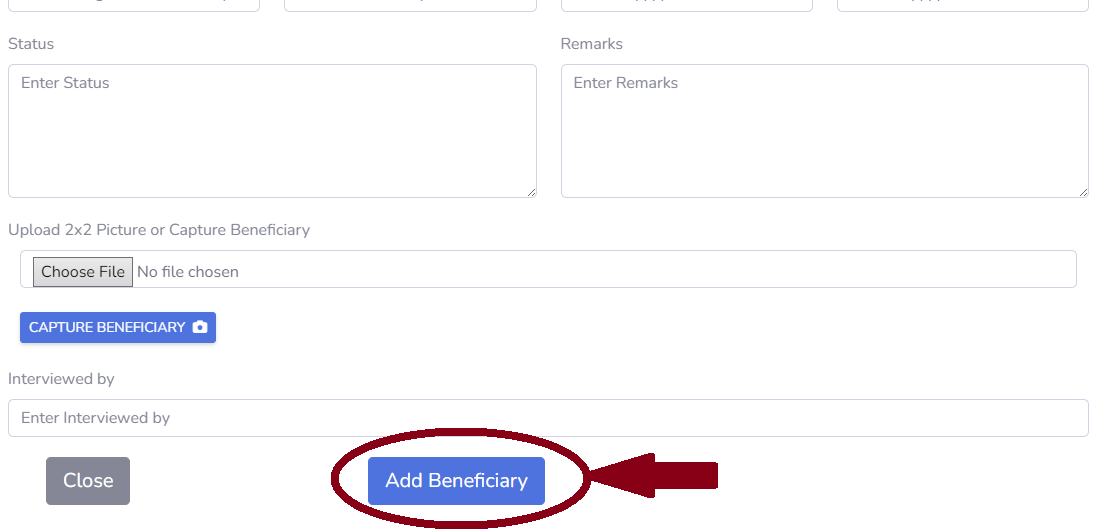
- Click the 'Add Beneficiary' button to add the beneficiary to the TUPAD Program.
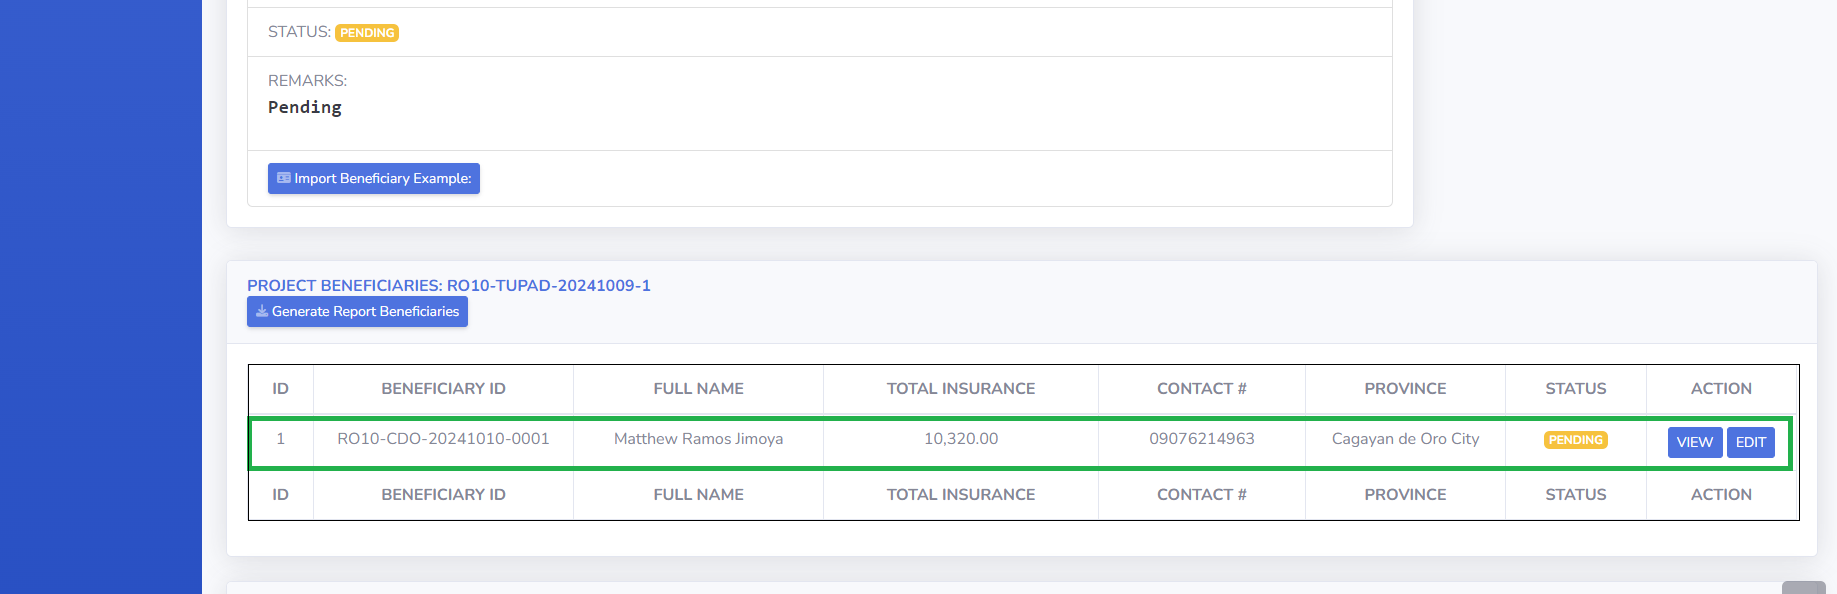
- Once the beneficiary is added, they will appear in the beneficiary list under their respective project.
3.5.4. Print Certificate of Service
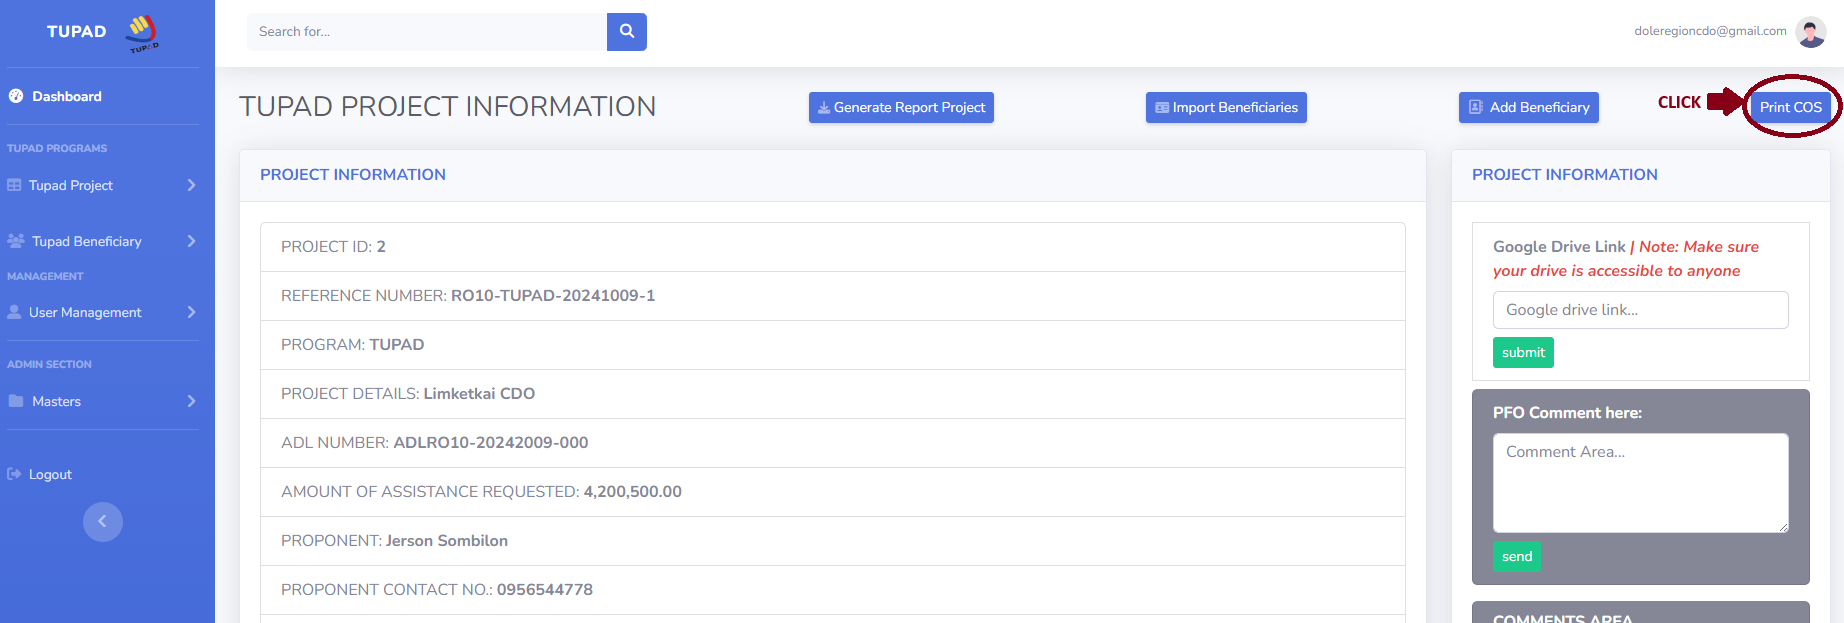
- Click the 'Print COS' button to view the Certificate of Service
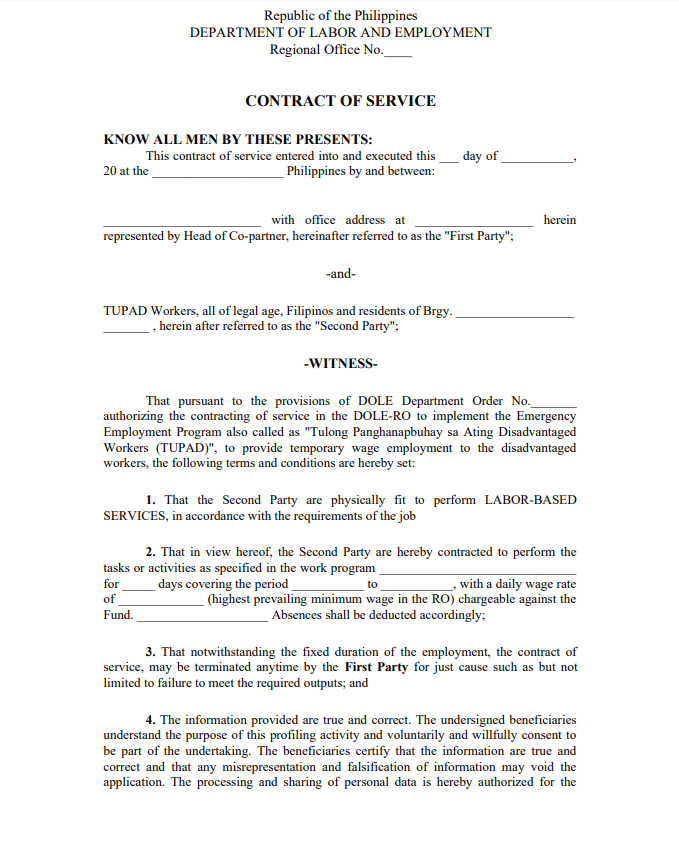
- Fist page of 'Certificate of Service'
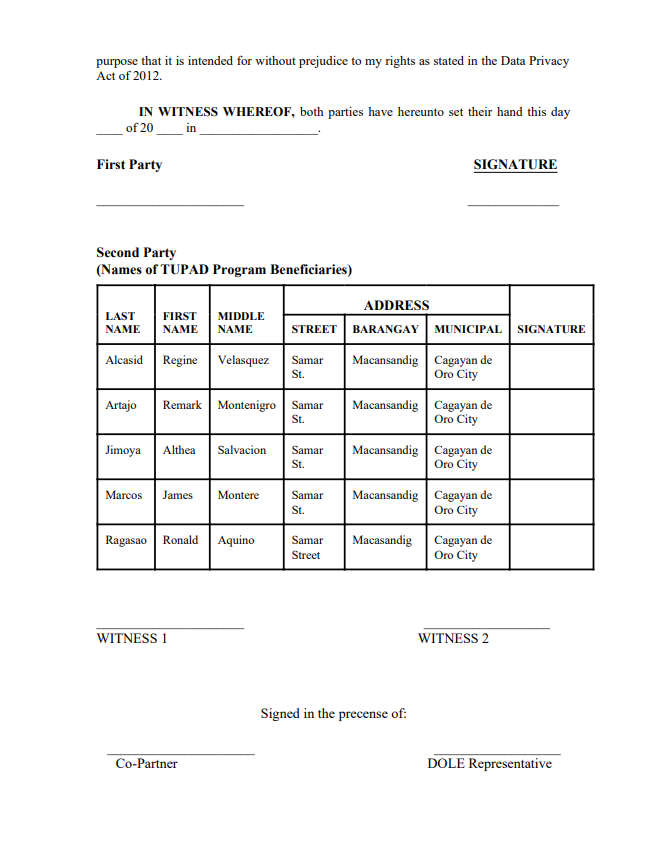
- Second page of 'Certificate of Service'
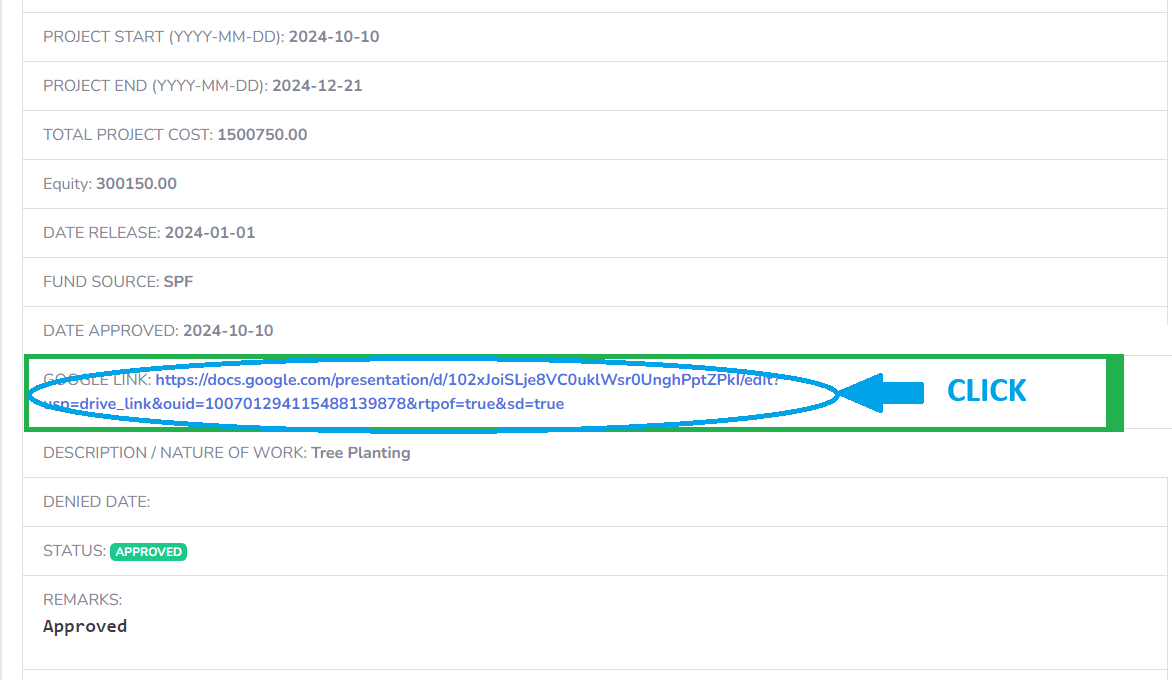
3.5.5. Pasting the Google Drive link
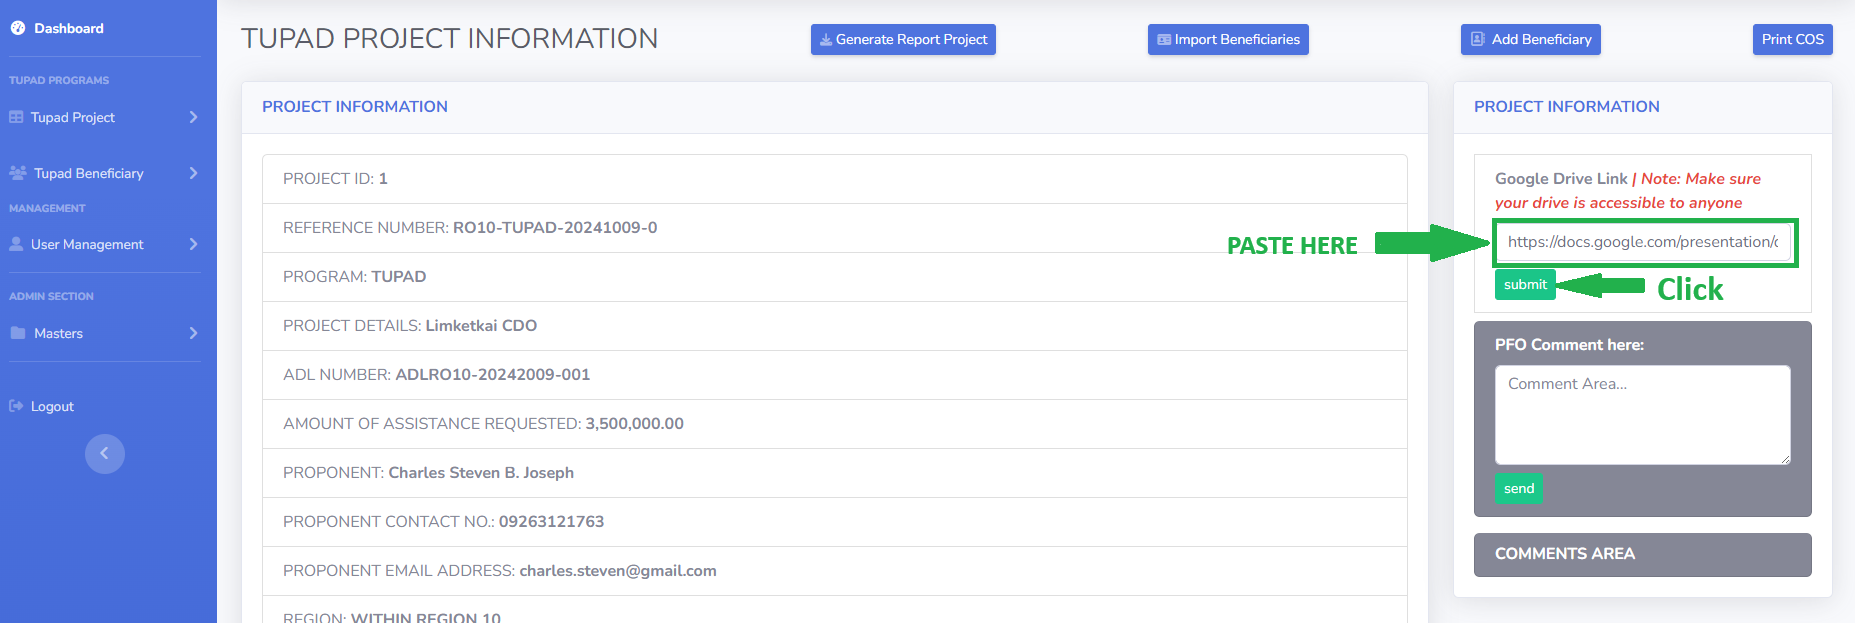
- The user must paste the Google Drive link in the field and click 'Submit' to send the link.
- The Google Drive link must contain the required files for the approval of the TUPAD Project.
- The Google Drive link that is submitted will appear in this area.
3.5.6. Comment Section
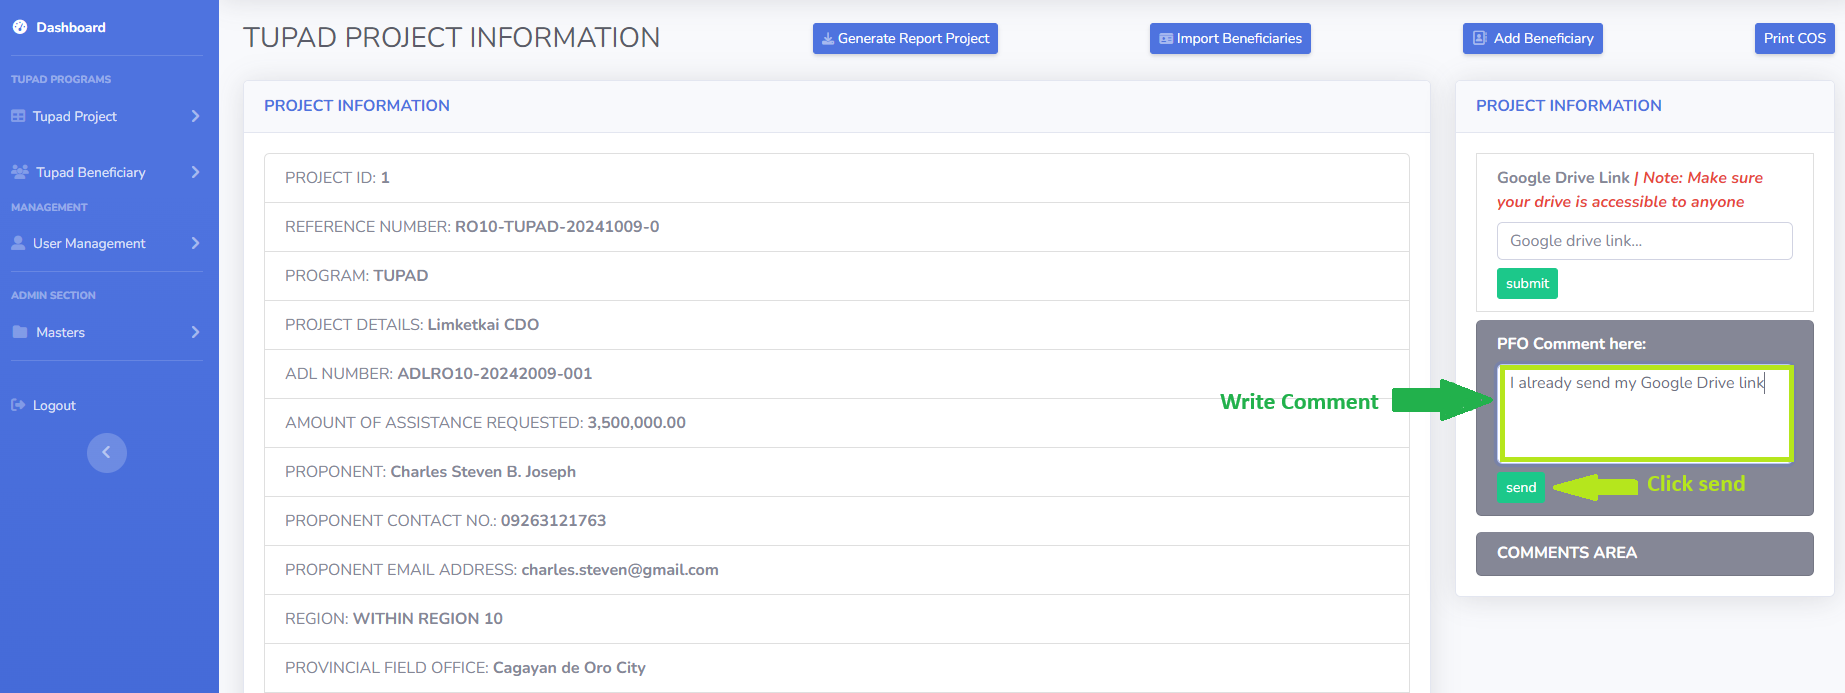
- PFOs can write a comment on their respective project and click 'Send' to submit the comment.
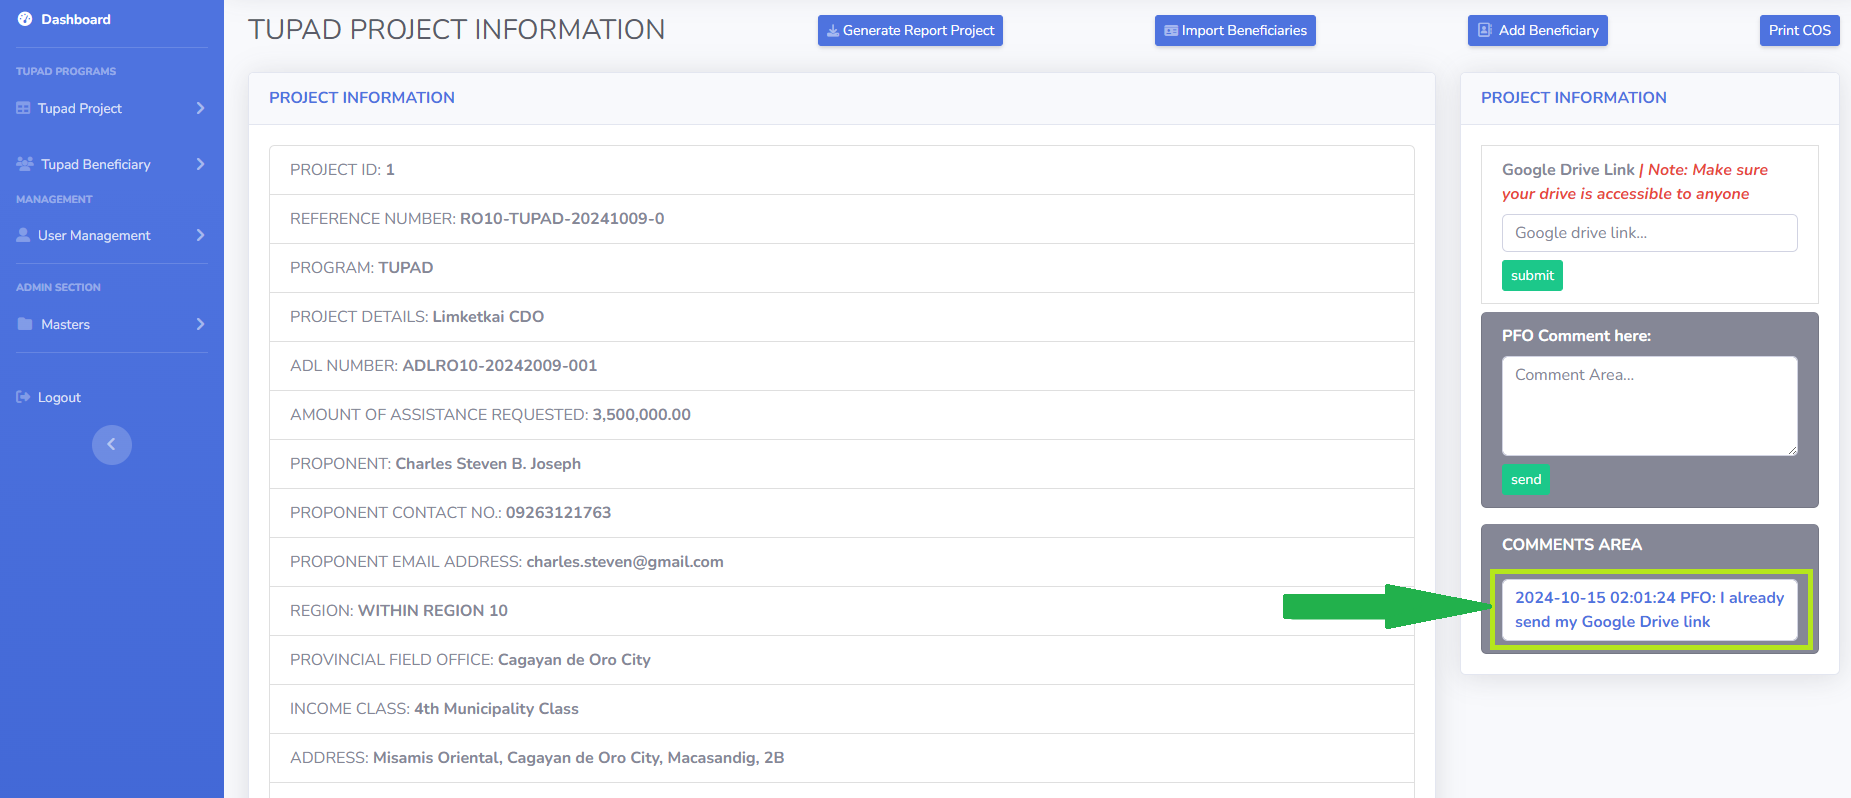
- After submitting the comment, it will appear in the 'Comment Area'.
3.5.7. Import Beneficiary Example File
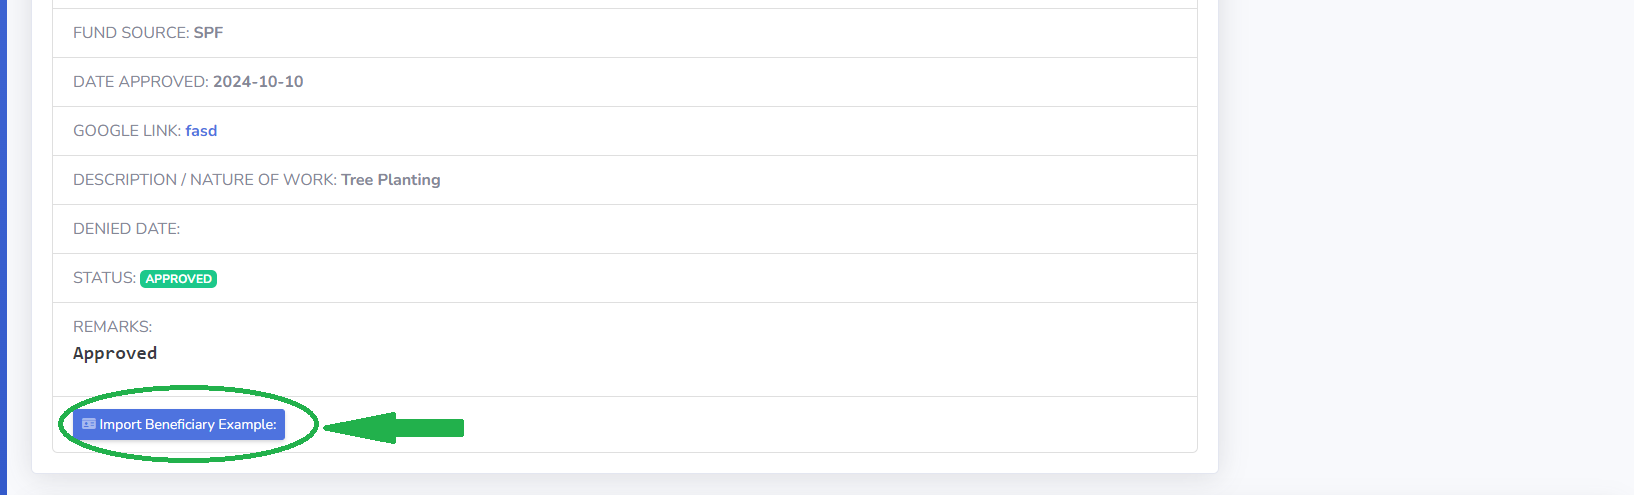
- Click the 'Import Beneficiary Example' button to be directed to the example file.

- The image shown is the Beneficiary Import Example file.
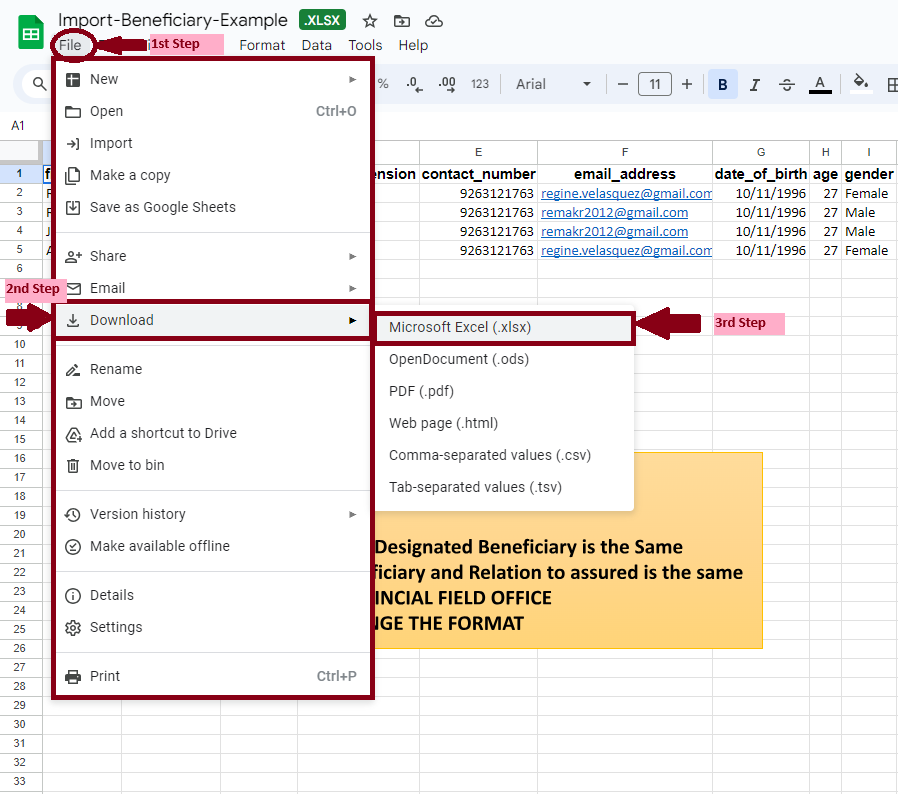
Follow the steps to download the Import Beneficiary Example File.
3.5.8. Tupad Export Beneficiary
- The export process on this page exports the beneficiaries to their specific TUPAD Project.
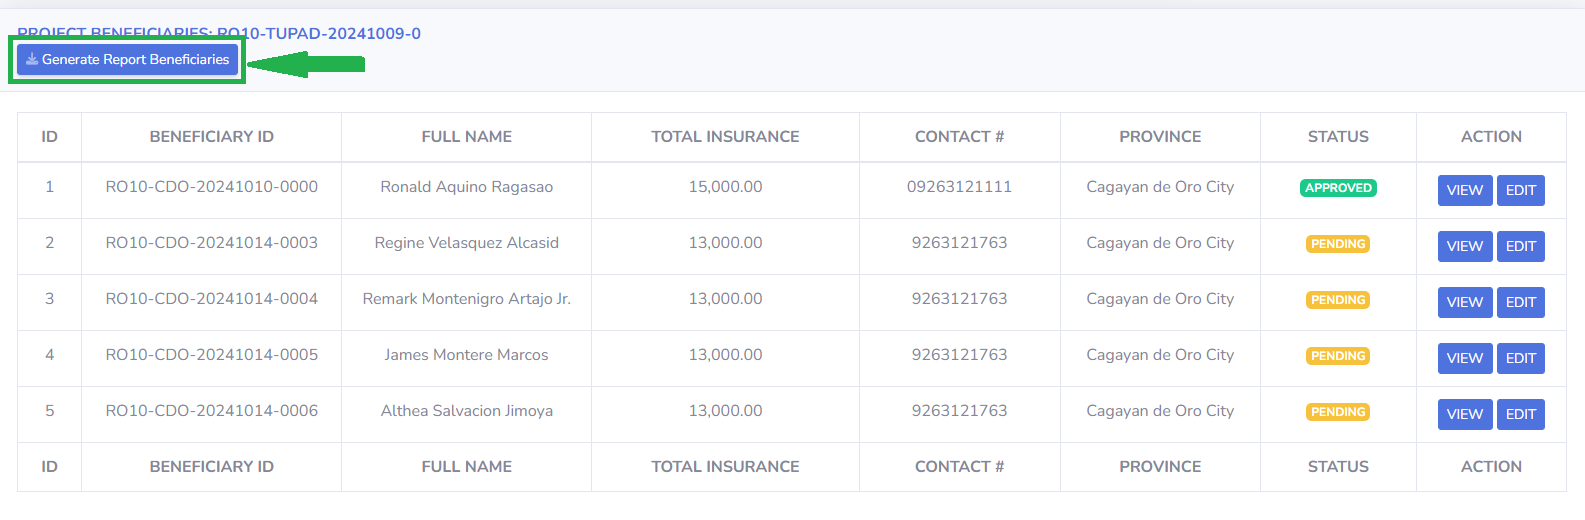
Click the 'Generate Report Beneficiaries' button to download the file.
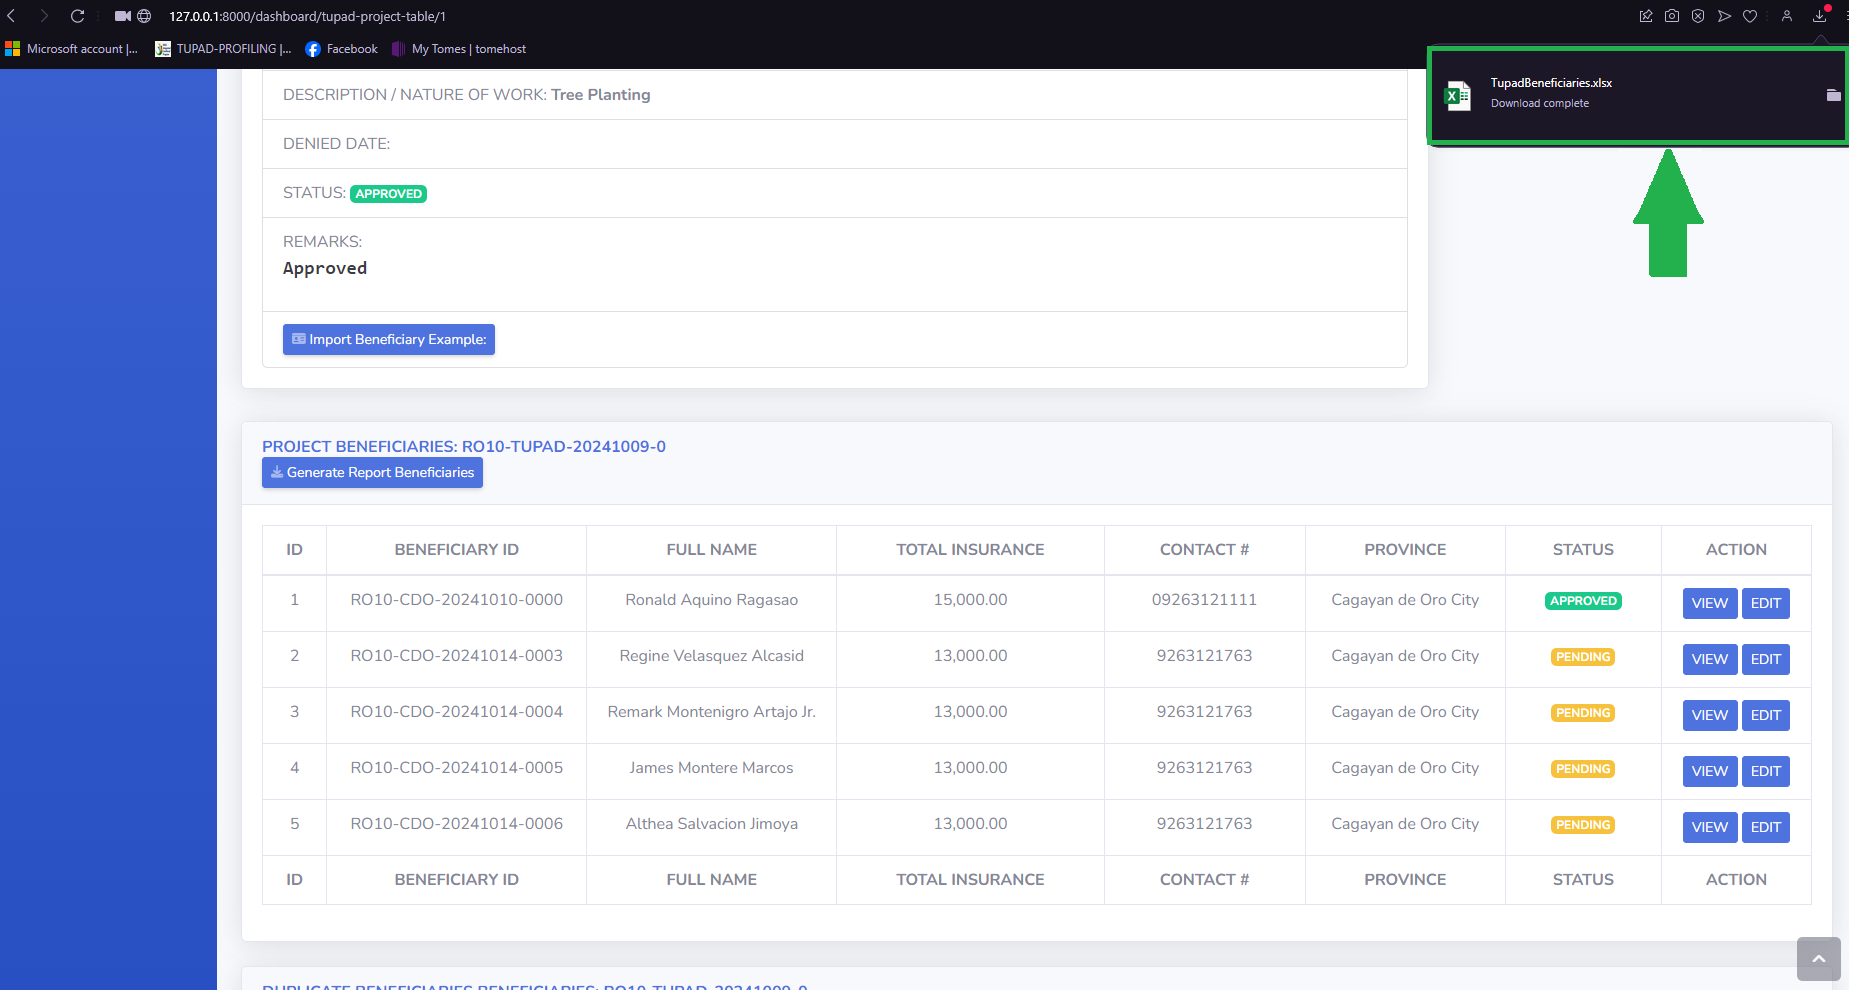
The beneficiary report will be downloaded after clicking the 'Generate Report' button, as seen in the picture.
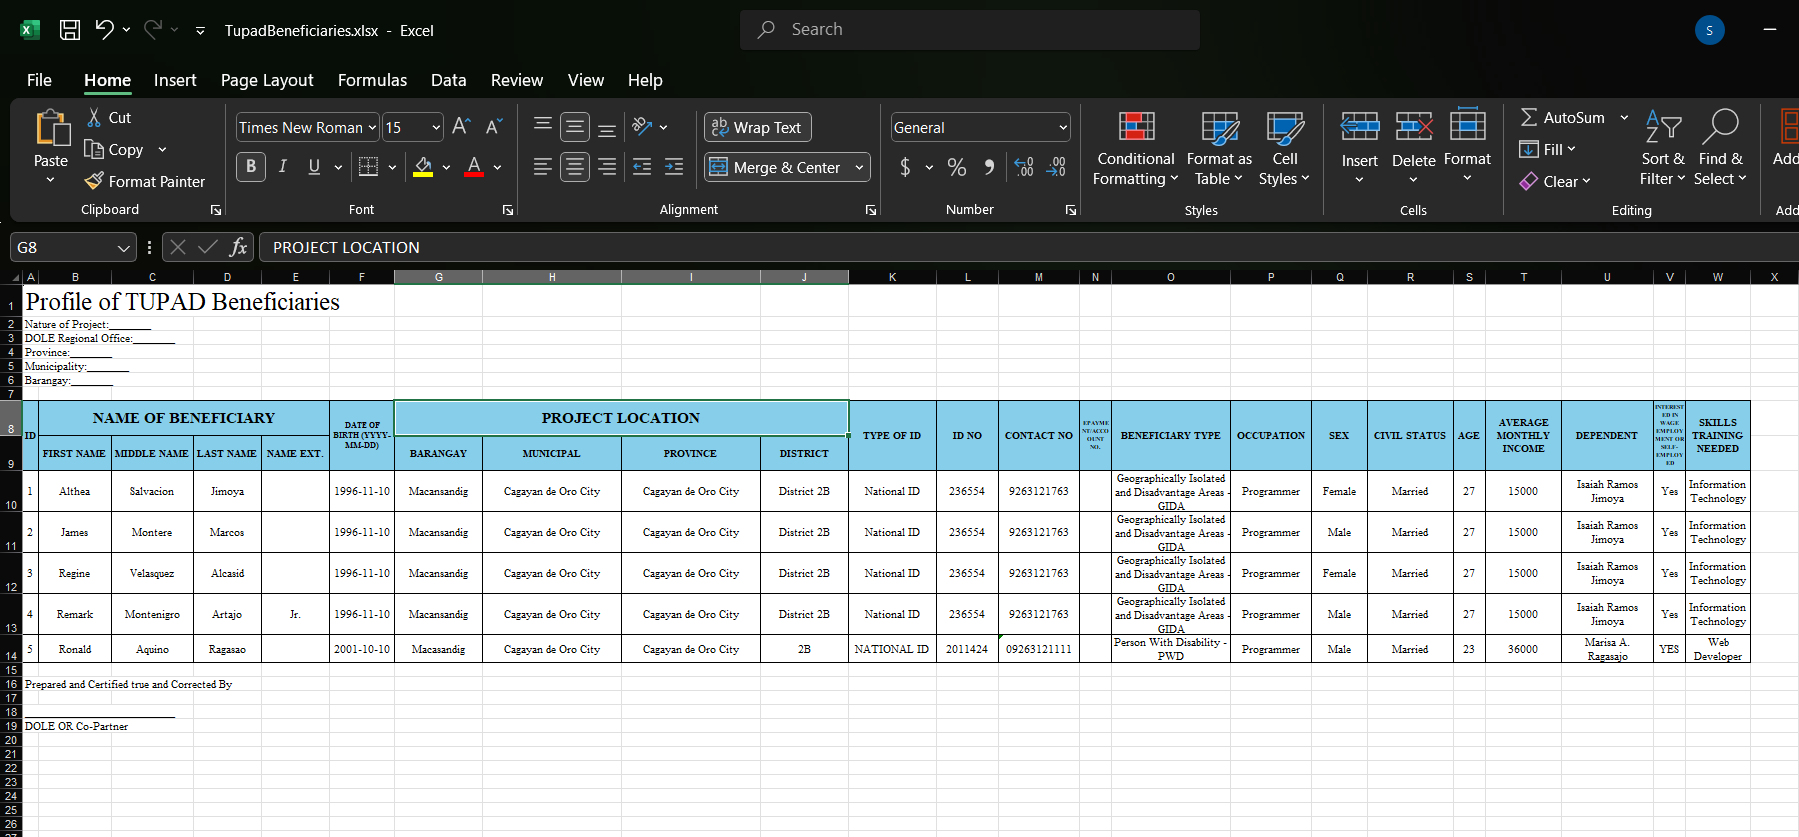
- The picture shows the Beneficiary File that was exported.